Initial Setup
To complete the installation of the StorONE system, you must configure the network addresses and various other settings for each S1 server node. In a dual-node high availability (HA) configuration, you must install the S1 operating system on each of the nodes and configure them separately.
When the S1 system boots up for the first time after installation, you must perform some initial configurations before the system is usable. From the console (typically accessed via an IPMI interface such as iLO, BMC, iDRAC, etc.), enter the default credentials:
-
Username:
admin -
Password:
storone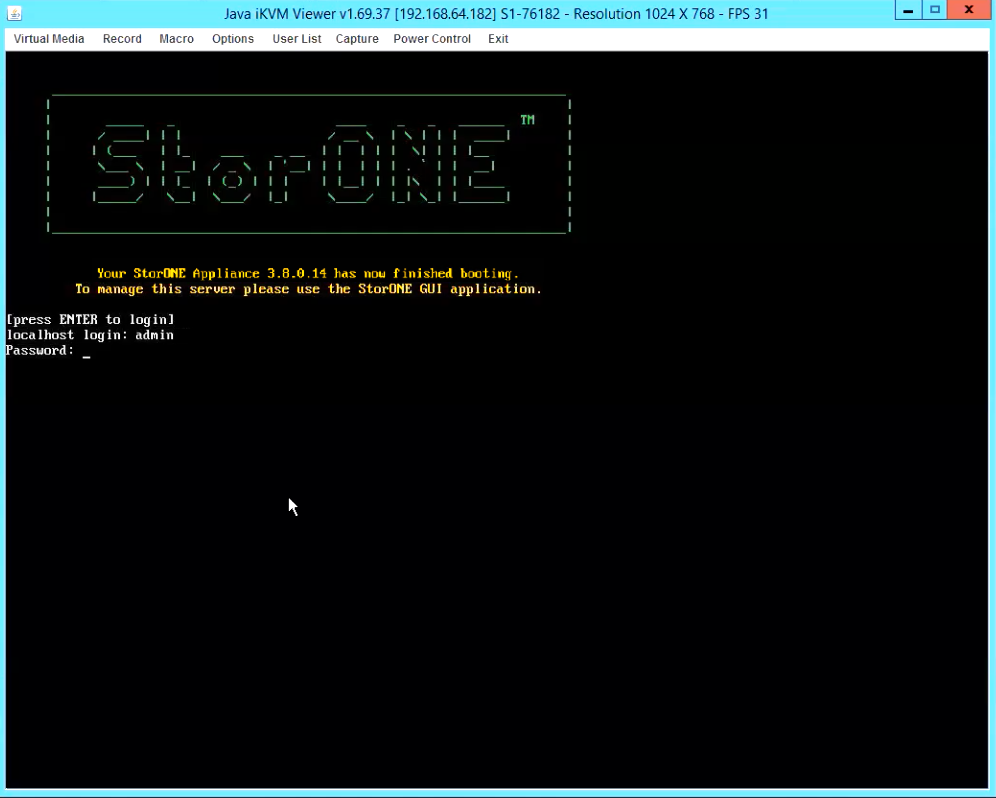
The first login might take a few minutes while the system sets up initial configurations. After logging in, the Terminal User Interface (TUI) appears. Use the TUI to configure system settings.
Using the Terminal user interface (TUI)
The Terminal user interface (TUI) uses the following keybindings:
| Operation | Keybindings |
| Navigate | Arrow keys |
| Enter | ENTER key |
| Go back | ESC key |
| Save settings | CTRL+S keys |
| Cancel operation (without saving) | ESC key |
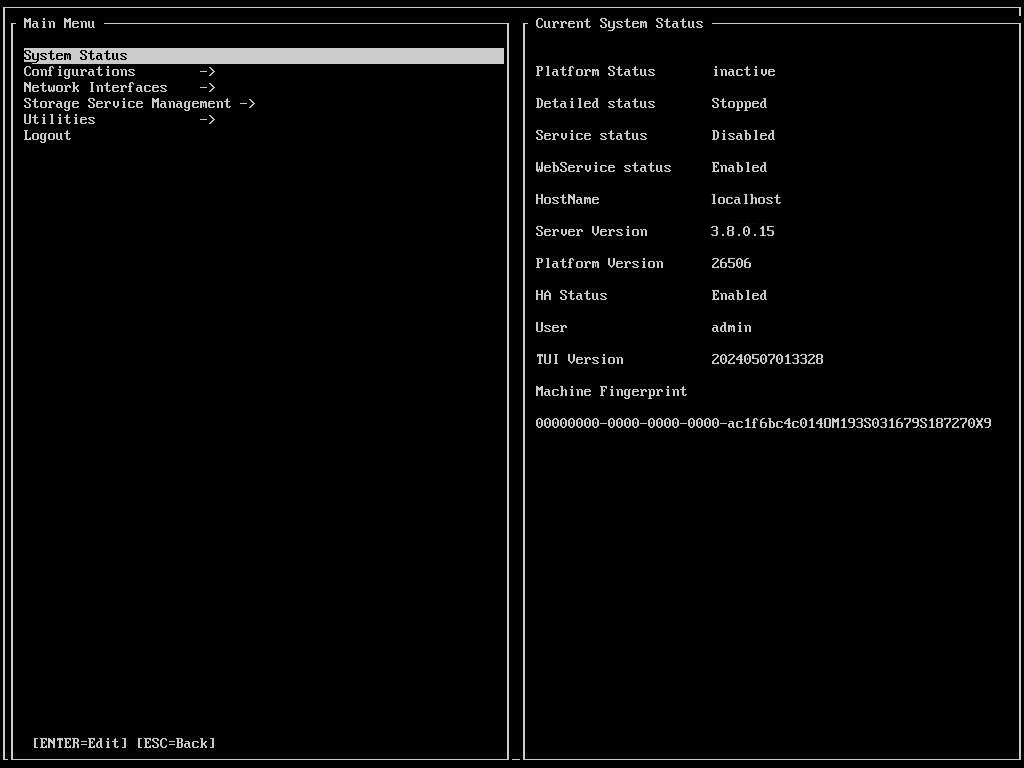
-
System Status
-
Configurations
-
Network Interfaces
-
StorONE Storage Service Management
-
Utilities
-
Logout
System Status
The System Status window displays system information as follows:
| Field | Description |
|---|---|
Platform Status |
Indicates whether the platform of the server node is currently active or inactive. |
Detailed Status |
Indicates the detailed status of the platform. |
Service Status |
Indicates whether the StorONE service on the server node is enabled or disabled. |
Webservice Status |
Indicates whether the WebService on the server node is enabled or disabled. |
HostName |
Displays the hostname of the server node. |
Server Version |
Displays the StorONE software version. |
Platform Version |
Displays the updated patch version of the storage engine. |
HA Status |
Indicates whether high availability (HA) is enabled or disabled. |
User |
Displays the user name of the S1 system (default is s1admin). |
TUI Version |
Displays the software version of the Terminal User Interface (TUI). |
Machine Fingerprint |
Displays physical node unique fingerprint. |
Configurations
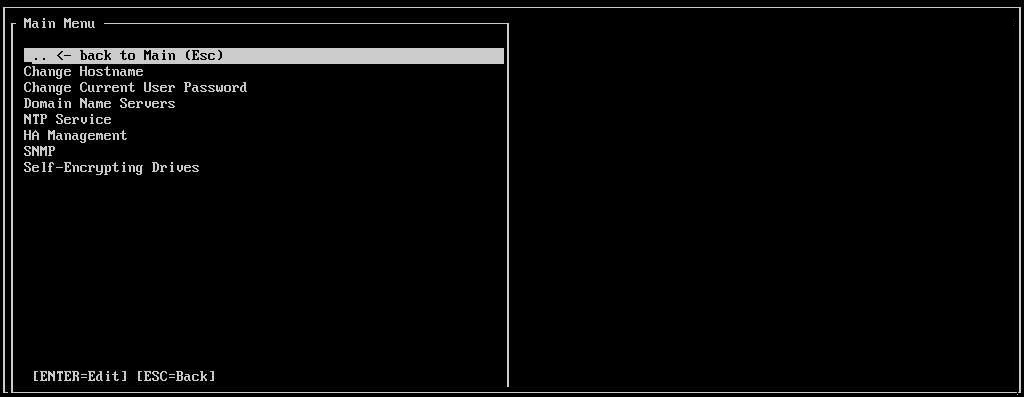
The configurations menu allows you to configure general settings for the server node as follows:
| Menu item | Description |
|---|---|
Change Hostname |
Changes the host name of the server node. |
Change Current User Password |
Changes the password for the 's1admin' user. The TUI has only one user. |
Domain Name Server |
Sets the domain name server. |
NTP Service |
Sets the Network Time Protocol (NTP) server address. |
HA Management |
Manages the High-Availability (HA) connection. |
SNMP |
Simple Network Management Protocol (SNMP) configuration. In this section you can configure the SNMP manager port, IP, and version, as well as agent and auth settings. |
Self-Encrypting Drive |
Provide the password for self-encrypted drives (SED). |
Network Interfaces
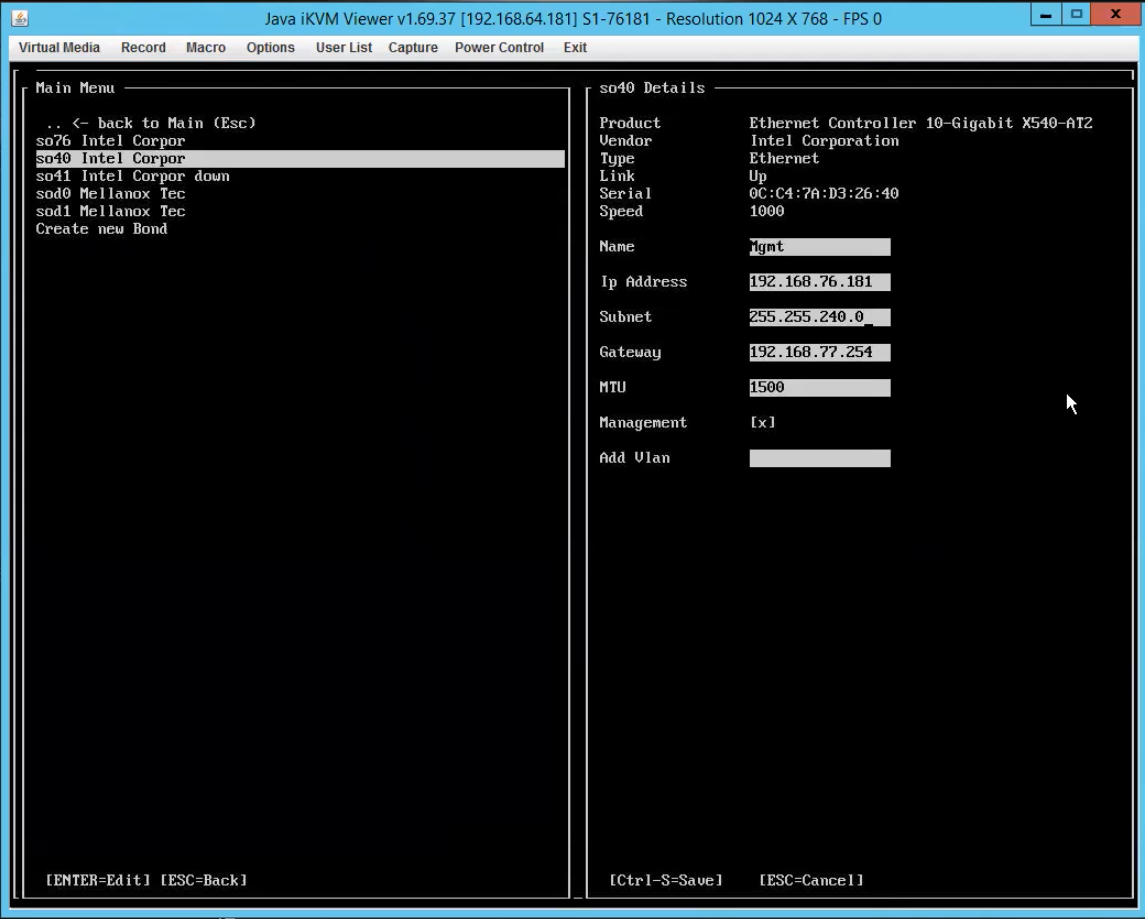
To configure the network interface cards (NICs) for the node, use the Network Interfaces feature. To access it, navigate to Network Interfaces from the main menu and press Enter. The Network Interfaces window appears, displaying a list of all the NICs installed on your server node, and indicating their link status. You can configure each NIC separately or bond NICs together.
Network Interface Card (NIC)
NICs are configured for three type of tasks:
- Management: For remote network access to the TUI and GUI, and used for communication with the relay machine.
- Data: For data access by clients and initiators.
- Interconnection: For communication between the two node servers in an HA (high availability) deployment.
The following table describes the NIC configuration options:
| Field | Description |
|---|---|
Name |
Assign a name for the NIC, you may use a custom name of your choice. StorONE recommends keeping the default name, but adding a -data or -mgmt suffix depending on the intended use of the NIC. This makes it easier to identify the interfaces when they are listed within the GUI or CLI. |
IP Address |
Assign an IP address for the NIC. |
Subnet |
Assign a subnet for the NIC. |
Gateway |
Assign a gateway for the NIC. |
MTU |
Set the Maximum Transmission Unit (MTU) for the NIC. |
Management |
Checkbox to indicate whether the NIC should be used as a management interface. |
Add Vlan |
Define whether traffic from the NIC should be tagged with a virtual local area network (VLAN) ID. |
Network interface bonding
Network interface bonding, also known as link aggregation, is a technique that combines multiple physical network interfaces into a single logical interface. The purpose of network bonding is to increase the network bandwidth, improve network reliability, and provide fault tolerance by distributing the network traffic across multiple interfaces.
The Create new Bond menu option creates a network bond from NICs that are installed on the node server. By bonding network interfaces, the network stack treats them as a single network interface, with a single IP address and MAC address. This allows network traffic to be spread across multiple interfaces, increasing the total available bandwidth, and provides redundancy in case one of the interfaces fails.
There are several bonding mode algorithms supported, each with its own advantages and disadvantages:
-
balance-rr (Round Robin): Transmit packets in sequential order from the first available interface, useful for load balancing. Balance-rr does not support automatic failover in case of network interface failure and may not be compatible with some network switches.
-
active-backup: Only one interface is active at a time, and the other interfaces are on standby, useful for redundancy and failover. Active-backup mode supports automatic failover, however in case of failover, the process can cause temporary disruption of network traffic.
-
balance-xor: Distributes outgoing traffic across the bonded interfaces using the XOR function. The XOR function uses a combination of the source and destination MAC addresses to determine which interface to send the packet through. The balance-xor options provides load balancing and fault tolerance by distributing outgoing traffic across multiple network interfaces. However, balance-xor may not be supported by all NICs. Additionally, the performance of the bonded interfaces may be limited by the speed of the slowest interface, which can become a bottleneck for the overall performance.
-
broadcast: In interface bonding through broadcast algorithm, network packets are sent through all bonded interfaces simultaneously. This allows for increased data transfer speeds and improved network reliability by minimizing the impact of individual interface failures. However, it can cause network congestion and reduce network performance, especially in large networks.
-
802.3ad or LACP (Link Aggregation Control Protocol): Dynamically manage the network links in the bond, allowing for automatic failover in case of link failure and load balancing across the active links. The 802.3ad mode may not support automatic failover, this can impact network availability in case of network interface failure. In the 802.3ad bonding mode each switch in the network must be configured to support the standard and use the LACP protocol. Additionally, the mode only works with MII link monitor.
-
balance-tlb (Transmit Load Balancing): Outgoing network traffic is distributed across all available network interfaces based on a simple hash of the packet header information. The balance-tlb bonding mode provides increased bandwidth and improved network performance, particularly for outgoing traffic-heavy applications. The balance-tlb mode does not support network interface failure. In some cases, the load balancing mechanism can lead to packet reordering which can affect the performance of some applications.
-
balance-alb (Adaptive Load Balancing): Outgoing network traffic is distributed across all available network interfaces based on a hash of the outgoing packet's source MAC address, useful for both load balancing and redundancy. Nevertheless, balance-alb mode may not provide automatic failover in case of network interface failure. In addition, the mode may introduce some packet duplication, which can affect the performance of certain applications.
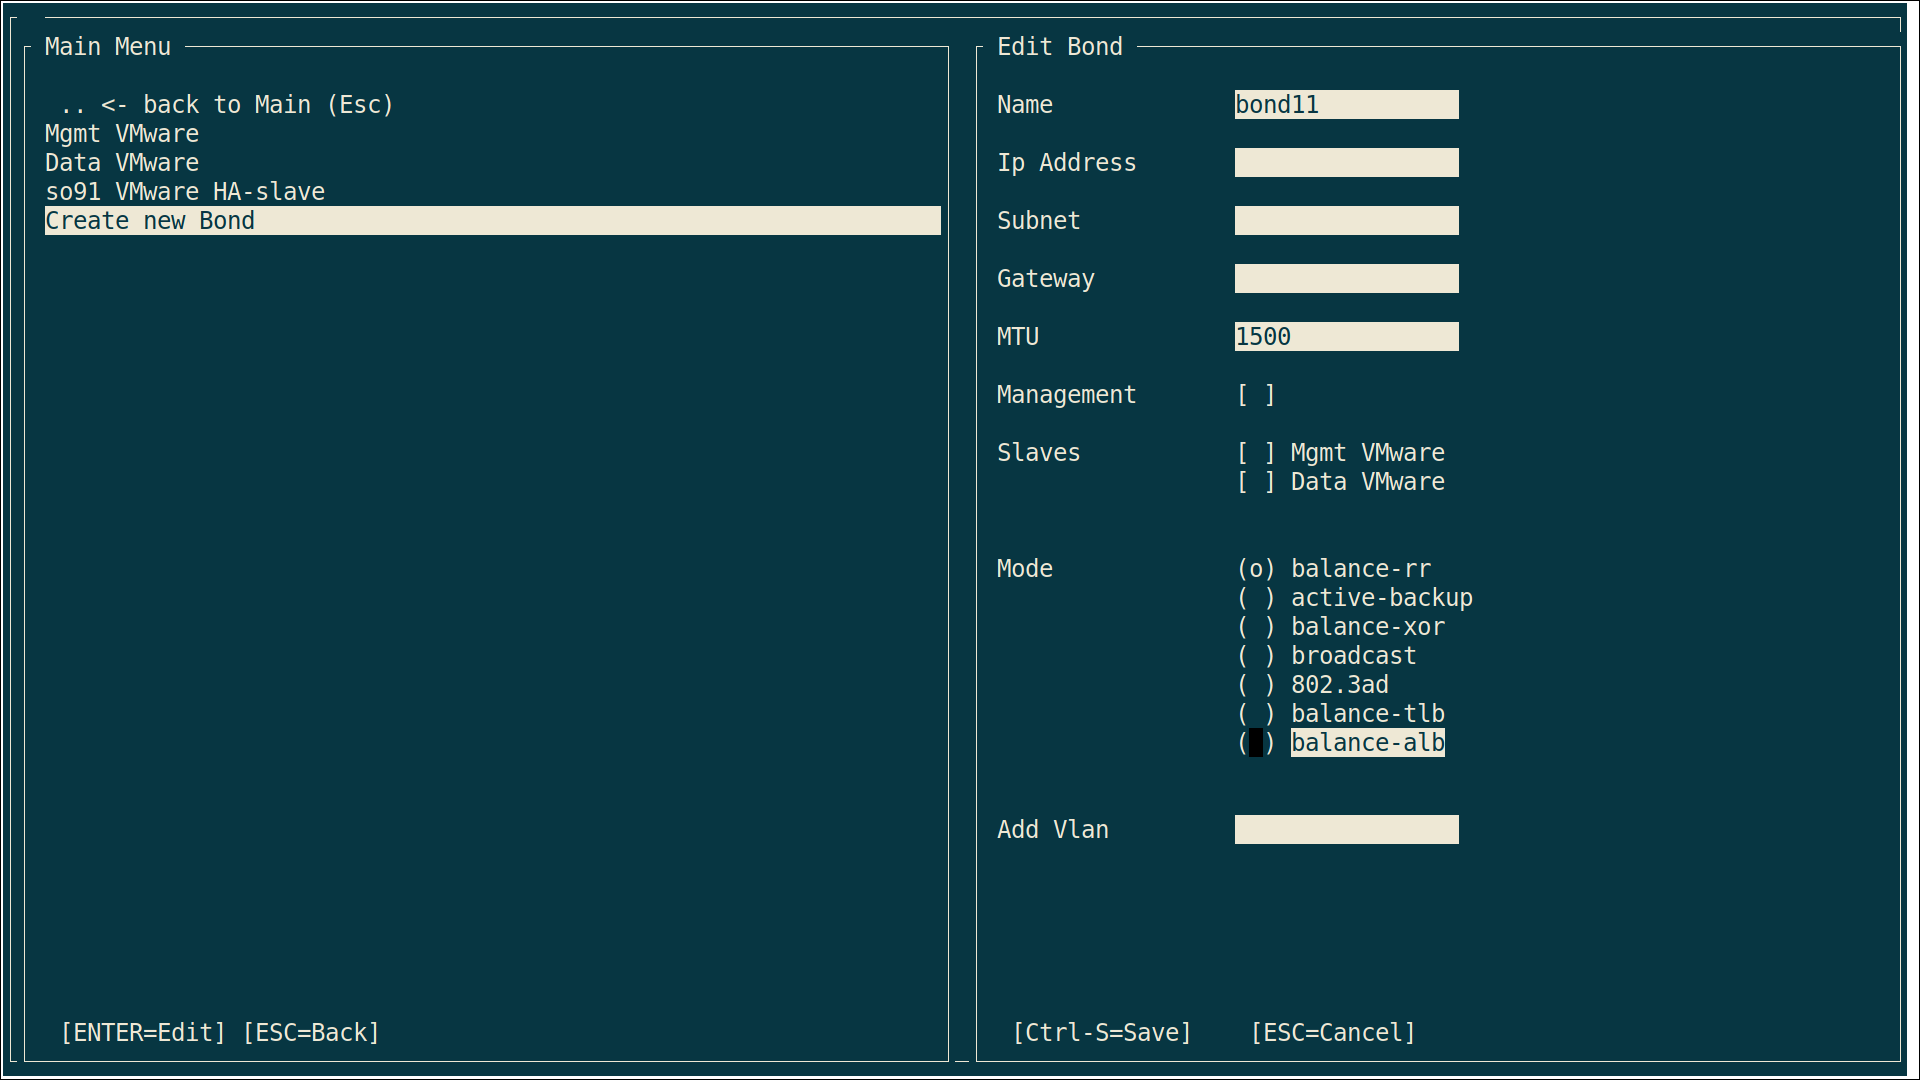
Network bonding configurations include the following fields:
| Field | Description |
|---|---|
Name |
Assign a name for the bond; you may use a custom name of your choice. |
IP Address |
Assign an IP address for the bond. |
Subnet |
Assign a subnet for the bond. |
Gateway |
Assign a gateway for the bond. |
MTU |
Set the Maximum Transmission Unit (MTU) of the bond. |
Management |
Checkbox to indicate whether the bond should be used as a management interface. |
Slaves |
Slave checkbox to specify NICs to bond. If checked, the NIC becomes a member of the bond. |
Mode |
Select a network bonding mode (balance-rr, active-backup, balance-xor, broadcast, 802.3ad, balance-tlb, or balance-alb). |
Add Vlan |
Define whether traffic from the bond should be tagged with a virtual local area network (VLAN) ID. |
To manage the node server, the Management option must be checked for at least one network interface (NIC or Bond).
StorONE Storage Service Management
| Menu item | Description |
|---|---|
Disable/Enable Automatic service start |
Enable or disable the automatic service start option. This option can be modified only when the StorONE service is not running. |
Stop/Start StorONE Service |
Stop or start the StorONE services. If stopped, the server node does not provide data access. In an HA system, all data traffic is handled by the remaining running node. In a single-node system (or if services are stopped on both nodes in an HA system), stopping the service makes the system (and data) unavailable. |
Disable/Enable StorONE Webservice |
Activate or deactivate the StorONE web service for the node server. When activated, you can go to the server name or IP address using your web browser to access the GUI and download the CLI client and some limited documentation. |
Reboot Machine |
Reboot this server node. |
Shutdown Machine |
Shutdown this server node. |
Utilities
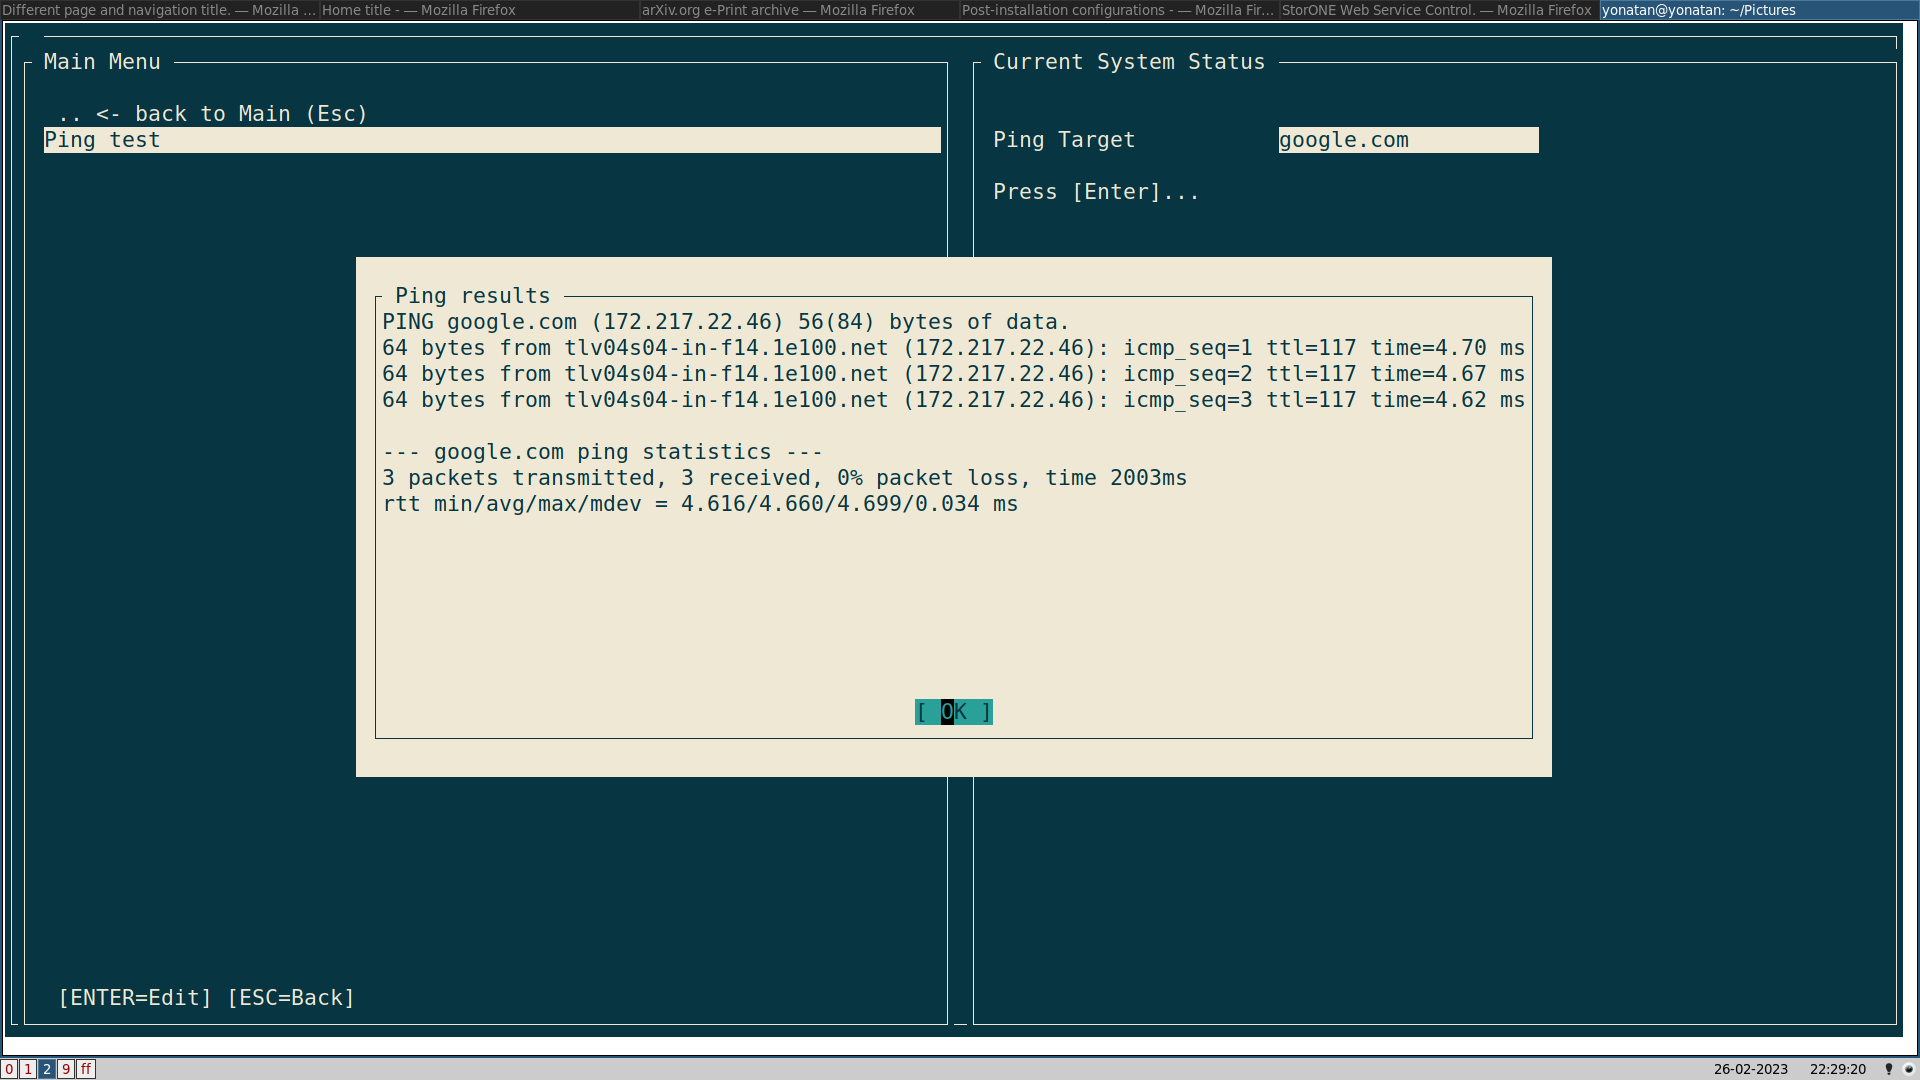
The Utilities section provides the ping utility for testing connectivity to other network hosts.
Logout
Logs out of the Terminal User Interface (TUI), and returns you to the console login screen.
Next steps
After you have configured the networking, you can access the web GUI. Before you can manage your system, you must provide a valid license. See Adding a license for instructions on obtaining and installing a license.

No comments to display
No comments to display