NIC replacement for StorONE Array controller
Network Interface Controller Replacement in StorONE array controllers
When replacing a Network Interface Controller (NIC) in a StorONE array controller it is important to maintain the same "interface name" used in the Text User Interface (TUI) for the Interfaces of the NIC being replaced. The floating IP address and replication ip address assignments are based on the IP address and the interface name when they are created and assigned.
This KB will explain the steps needed to replace a NIC in a StorONE array controller.
- Identify Network Interface Controller (NIC) to be replaced.
- Text User Interface (TUI) login and gathering interface information
- Array controller failover, shutdown and NIC replacement
- Array controller startup, TUI login and creating interfaces for replacement NIC
- Start array controller services and Verify NIC replacement via CLI
Identify the Network Interface Controller (NIC) to be replaced
A NIC which is still "link down" after verifying the issue is hardware and not configuration related, can be determined to be a bad NIC. We can view the loss of connection to this NIC from the array via email alert, and the UI and CLI:
Example of an email for Link Down:
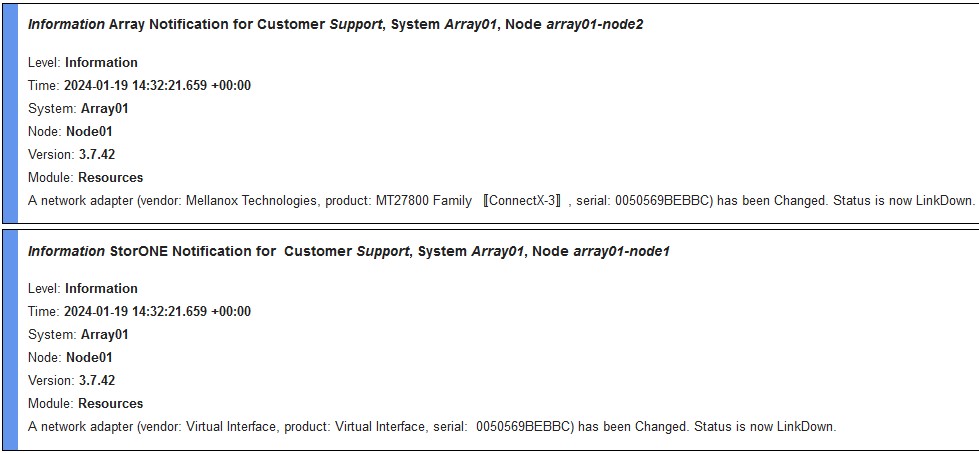
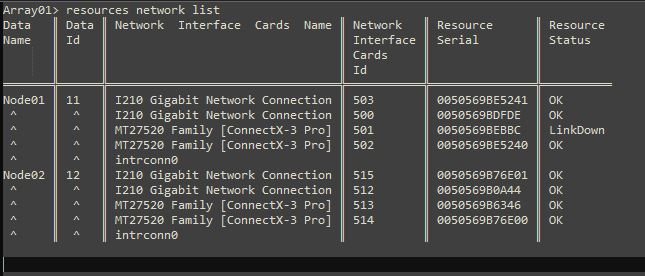
Example from the array CLI:
After safely isolating the down link to a possible or probable hardware, proceed with NIC replacement.
To verify the array controller addresses from the CLI:
nodes list --ip

Text User Interface (TUI) login and gathering interface informtion
From the array controller where the NIC, will be replaced, log into the Text User Interface (TUI) to get the information for that interface and NIC.
The TUI can be logged into via IPMI remote console connection, or via SSH to the Management or Data IP address for the controller
The default login for the TUI is below. If the password has been changed this must be provided by the array administrator to login:
login: s1admin
password: storone
The information required from the TUI is the interface NAME, and IP addresses and a VLAN configuration if any are present. The down NIC or interface will be easy to spot from the TUI
If any bonds have been created to combine multiple interfaces or configure multiple VLANs with VLAN tagging, all of the BOND names and IP addresses
The interface name needs to be noted it is recommended to append the interface name with "-OLD", If Bonds are in use, they must also have the bond name appended with "-OLD" for each Bond which contains a NIC which will be replaced.
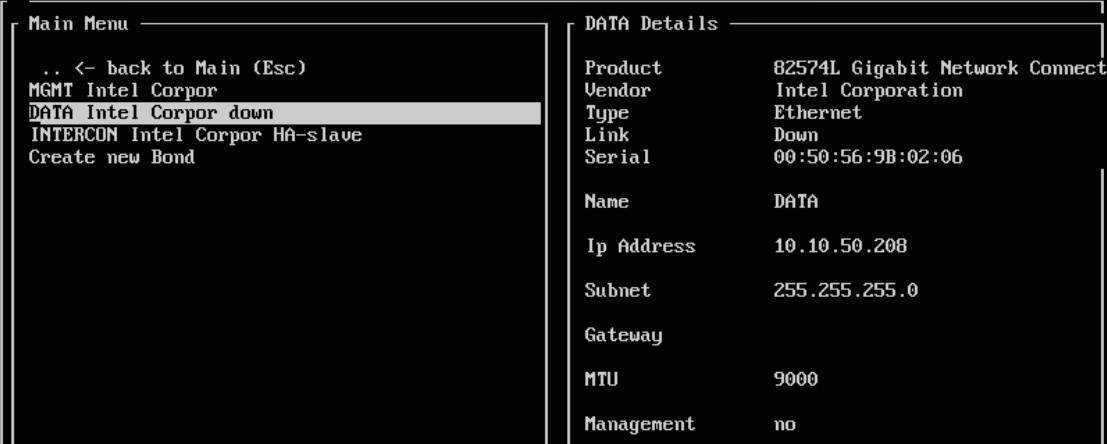
In our example the interface is named "DATA". It has no VLANs or is part of a BOND.
NOTE: When renaming the interfaces, take note of the MAC address for the NIC(s) to be replaced as we will need to identify that when physically opening the array controller chassis.
With "-OLD" appended to the interface and or bond name(s), proceed with stopping services on the controller, stopping services and shutting down for replacement.
NOTE IF the failed NIC is an array controller interconnect we will have an additional next step when replacing the NIC
Array controller failover, shutdown and NIC replacement.
To stop services on the array controller, use the ESC key to get back to the main menu for the TUI
Select Storage Management Services -> Stop Service and press ENTER. Wait for the status to update to Platform Status: Inactive
Select DISABLE Automatic service start and press ENTER. Wait for the status to update to DISABLED
Then select SHUTDOWN Machine and press RETURN to shutdown the array controller for Physical NIC replacement.
When replacing the physical NIC, Please refer to the best practices for your array controller hardware. All Power, Network and SAS cables should be identified and labeled for replacement in the proper interfaces. Usint the notes from the TUI and CLI itnerfaces to identify the MAC address of the NIC to be replaced.
When replacement is completed, and the array controller is recabled, power on the array controller to proceed.
NOTE: the new NIC interfaces will be identified by the last two characters of their Media Access Control (MAC) address. Be sure to note the MAC address(s) on the physical interface to help identify them in the StorONE controller
Array controller startup, TUI login and creating interfaces for replacement NIC
Start the array controller normally using remote power on or with the power switch. The array controller may take some time to boot depending on hardware checks and needs to update the server inventory.
Once the controller is up, log into the TUI as s1admin and provide the password
In the TUI we will see the old interface which we appended with "-OLD" and a new Interfaces(s) available from the NIC.
NOTE: IF the NIC being replaced is one NIC in a MULTI NIC bond, then select the BOND, remove the old NIC, and select the new NIC for the bond and SAVE the configuration with "CTRL+s" No Additional steps are needed here proceed to
NOTE: IF the interface being repalced is used for an Interconnect
ONLY DO THIS STEP If an Interconnect is being replaced If the interface is Management or Data, continue with the replacement guide.
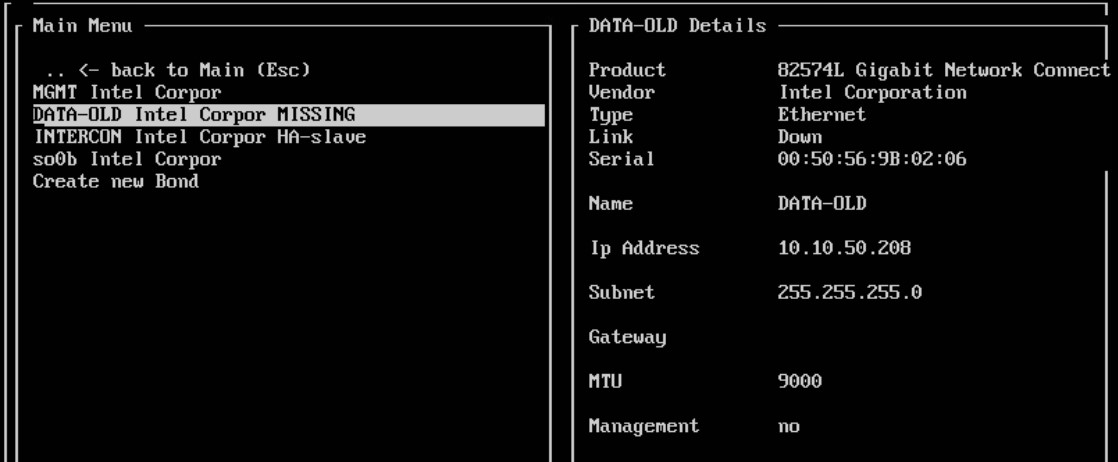
With our notes and the information visible from the "-OLD" interface in the TUI, fill in the required IP, Subnet, and Gateway and VLAN. Make sure to save this information, Including the correct MTU for each interface. Screenshot of each interface and bond with "MISSING" will need to be recreated.
To recreate the interfaces, the old interfaces must first be deleted from the TUI, for this reason screen shots are recommended when using bonds and multiple VLANs.
To delete the "MISSING" interfaces: Select the interface and then press F10 to delete
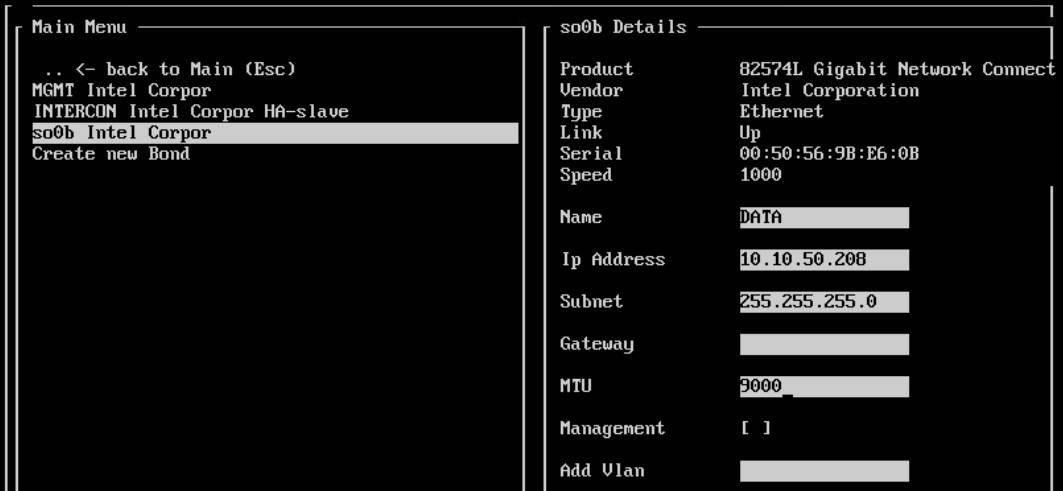
To create the new interfaces for replacement NIC(s) select the new interface, enter the correct interface NAME, IP, subnet, gateway, MTU, and VLAN.
IF the NIC being replaced is used for Management, select the Management box.
Once the information is correct and configuration completed, press "CTRL+s" to SAVE the configuration.
Start array controller services and Verify NIC replacement via CLI
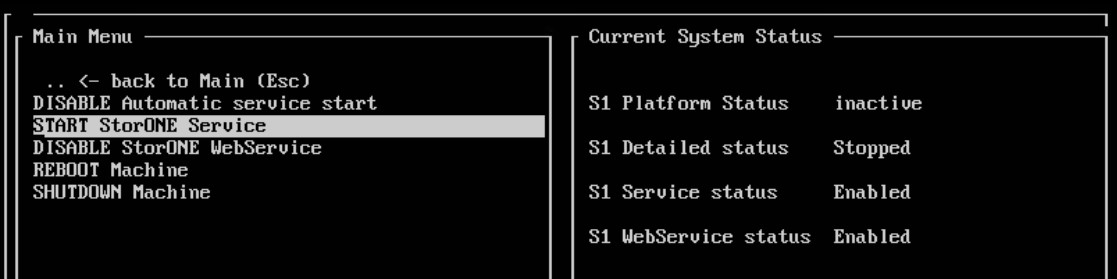
To start the array controller services:
Select Start StorONE service press ENTER
Press the "ESC" key to back out of the main menu and exit the TUI
Using the CLI application login to the array as an Admin user
From the CLI run the following commands
settings outout --table -> This changes the way the CLI application will display data
resources network list --details -> This displays the Nodes, Interfaces, Interface status, IP addresses and more.
Example:
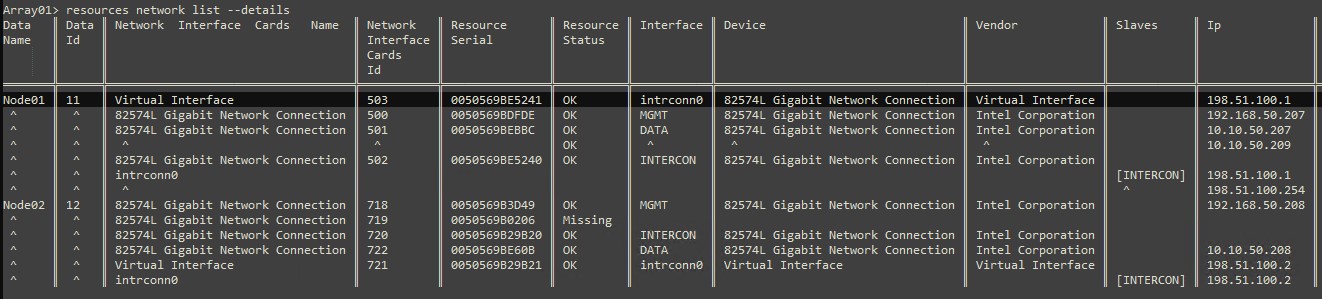
This shows that the new interface is available and is configured on array controller
The command: floatingips list shows the floating IPs for the array and the array controllers and interfaces the floating IP can use on each node.

With the NIC replacement complete and verified to remove the missing interface component use the command
resources delete --all
This will remove any missing resources for both array controllers.
No comments to display
No comments to display