
Add StorONE Object Store to ProxMox Backup Server as a datastore
Summary
This document explains how to use a StorONE Object Store with a ProxMox Backup Server as a datastore for backups
Assumptions
This document assumes you already know how to create an Object Store on the StorONE and you know you keys, secrets, and ports.
S3 Endpoint
The ProxMox Backup Server will only access S3 endpoints that use HTTPS. Ensure that SSL is enabled on the Object Store that was created. Since the StorONE uses self-signed certificates we need to get the fingerprint from the StorONE to properly set the endpoint.
In order to get the fingerprint you can use the openssl executable from any box that has access to the Object Store's floating up like this:
openssl s_client -connect <storone floating IP>:<object store port> -servername <s1 floating ip> </dev/null 2>/dev/null | openssl x509 -noout -sha256 -fingerprintExample of the command with the output:
openssl s_client -connect 10.10.50.106:9920 -servername 10.10.50.106 </dev/null 2>/dev/null | openssl x509 -noout -sha256 -fingerprint
sha256 Fingerprint=63:A9:C0:CE:3C:5F:3A:75:E3:65:6B:F4:4D:93:51:97:74:AB:0D:0C:56:A9:23:EC:C4:ED:B6:E4:87:EC:CC:5E
Make a Bucket
while you are on your linux box getting the fingerprint, you can also use the awscli to create a bucket to use with this process:
aws --endpoint-url https://<s1 floating ip>:<object port> s3 mb s3://newbucket --no-verify-sslExample:
aws --endpoint-url https://10.10.50.106:9920 s3 mb s3://newbucket --no-verify-ssl

aws --endpoint-url https://10.10.50.106:9920 s3 ls --no-verify-ssl
urllib3/connectionpool.py:1097: InsecureRequestWarning: Unverified HTTPS request is being made to host '10.10.50.106'. Adding certificate verification is strongly advised. See: https://urllib3.readthedocs.io/en/latest/advanced-usage.html#tls-warnings
2026-09-18 15:45:34 backupbucket
2026-09-18 21:31:57 newbucket
2026-09-18 15:50:31 pbs
2026-09-18 15:53:00 under
On the ProxMox Backup Server add a new S3 Endpoint:
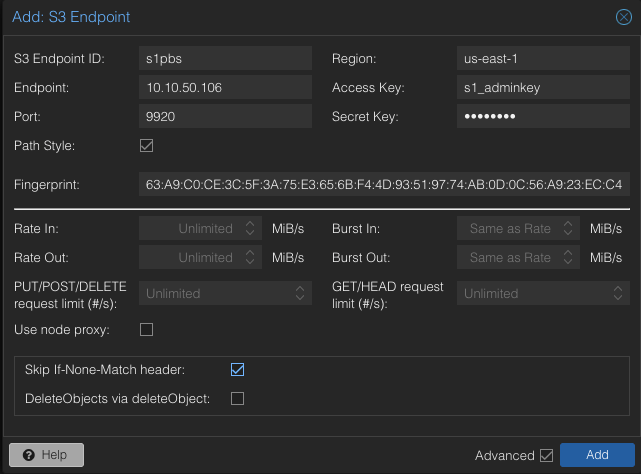
S3 Endpoint ID: Whatever you want to name the Endpoint in the ProxMox Backup Server
Endpoint: The floating IP of the StorONE
Port: The port that you applied to the Object Store on the S1
Path Style: make sure this is checked
Region: arbitrary but you can put us-east-1 or us-west-1
Fingerprint: the output you got from the openssl command before
Skip If-Non-Match header: make sure this is checked.
Add a Datastore
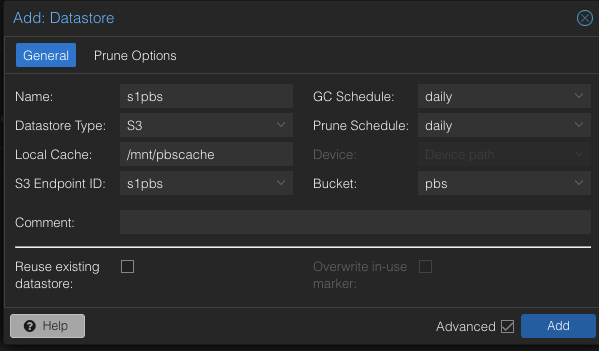
Name: The name you want the datastore to have
Datastore Type: S3
Local Cache: the absolute path of a local directory
S3 Endpoint ID: the dropdown should give you the endpoint you added earlier
Bucket: The buckets should be available in the dropdown
Your S3 Datastore should be created
Note for when adding to your ProxMox Server Storage:
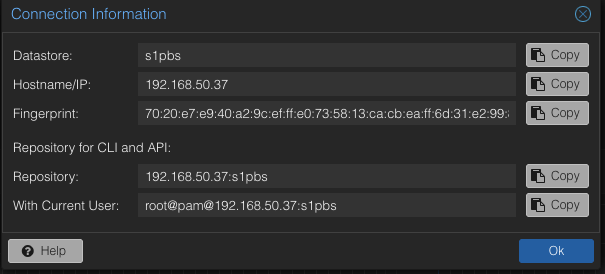
When adding the ProxMox Backup Server to the PVE Server you need the fingerprint and user information for the datastore.
On the ProxMox Backup Server ensure your users have permission to access the datastore. Go to Configuration -> Access Control. Ensure you have a user and it has the appropriate permissions. Under Access Control go to Permissions and Add:
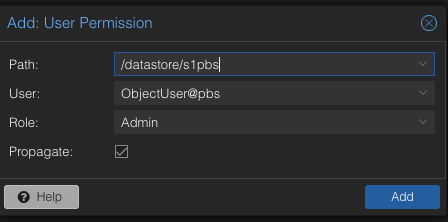
Note the user here is ObjectUser@pbs
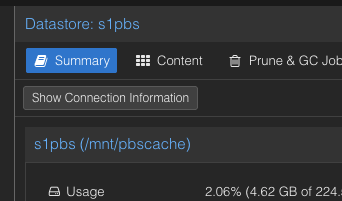
Then get the fingerprint/connection information from the Datastore. Select the Datastore on the left panel:
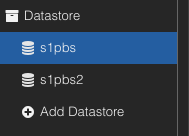
And on the right click on Show Connection Information:
You should see information like this and you can copy the fingerprint:
On the PVE Server
Go to the Datacenter and select Storage and click add:
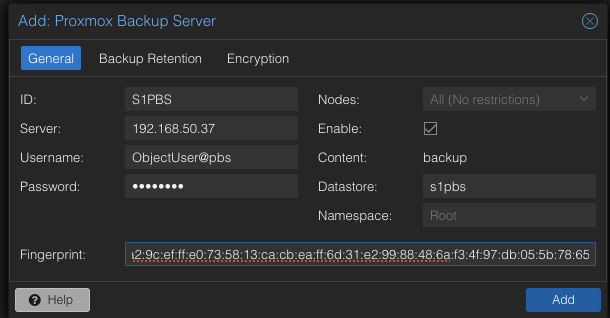
ID: your unique name for the PB Server
IP: the IP of the PB Server
Username: a user that has permissions for the datastore
Passowrd: the user's password
Datastore: the datastore created for the backups
Fingerprint: the fingerprint you got from the Show Connection Information above