
ProxMox - Add a ThinLVM Storage device to iSCSI LUN
Summary
ProxMox requires some extra steps to utilize thin provisioning when connecting to an iSCSI LUN
Software Versions Tested
This procedure was created and tested using StorONE 3.8.0.56 and ProxMox 8.3.0
Assumptions
This document assumes that you already know how to provision ISCSI LUNs in the StorONE software and how to attach them to ProxMox Servers
Steps
In order to setup the LUN so it can be configured as a THIN LVM Storage Device you will need to have access to the Console of the ProxMox server (via SSH or the UI's Console link)
Find the NAA number of the LUN you want to setup as a ThinLVM in the StorONE UI:
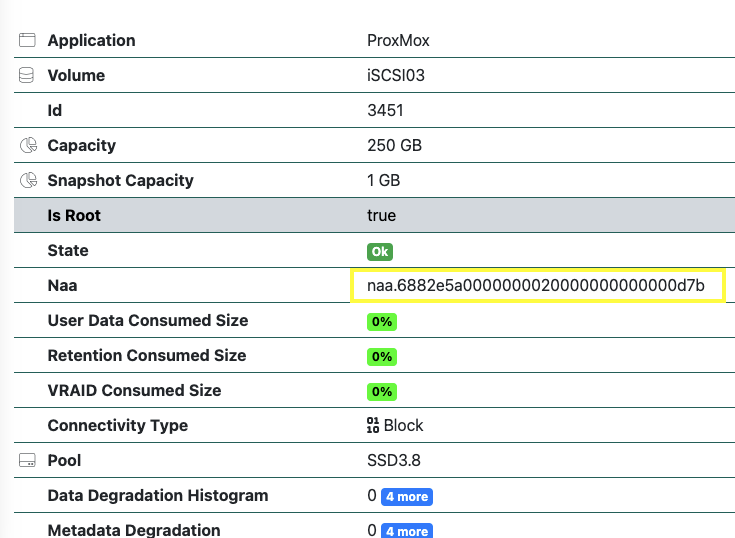
In the ProxMox CLI find the mapper device that matches the NAA ID you found from the StorONE UI:
root@pve:~# multipath -ll |grep 6882e5a0000000020000000000000d7b
mpathc (36882e5a0000000020000000000000d7b) dm-16 STORONE,S1
In this example the device we are going to configure is mpathc. The first thing that needs to happen is to add it to the Physical Volume List:
root@pve:~# pvcreate /dev/mapper/mpathc
  Physical volume "/dev/mapper/mpathc" successfully created.
root@pve:~# pvs
  PV                 VG      Fmt  Attr PSize    PFree
  /dev/mapper/mpatha S1disks lvm2 a--  <232.83g      0
  /dev/mapper/mpathb s1thin  lvm2 a--  <232.83g      0
  /dev/mapper/mpathc         lvm2 ---   232.83g 232.83g
  /dev/sda3          pve     lvm2 a--  <892.75g  16.00g
The next step is to create the volume group with that new PV we just added:
root@pve:~# vgcreate S1ThinVG /dev/mapper/mpathc
  Volume group "S1ThinVG" successfully created
root@pve:~# vgs
  VG       #PV #LV #SN Attr   VSize    VFree
  S1ThinVG   1   0   0 wz--n- <232.83g <232.83g
  S1disks    1   3   0 wz--n- <232.83g       0
  pve        1   3   0 wz--n- <892.75g   16.00g
  s1thin     1   1   0 wz--n- <232.83g       0
In the above example S1ThinVG is the name of the Volume Group we are creating.
The next step in the CLI is to create the thin logical volume:
root@pve:~# lvcreate -l 100%FREE -T -n S1ThinLV S1ThinVG
  Thin pool volume with chunk size 128.00 KiB can address at most 31.75 TiB of data.
  Logical volume "S1ThinLV" created.
root@pve:~# lvs
  LV            VG       Attr       LSize    Pool   Origin Data%  Meta%  Move Log Cpy%Sync Convert
  S1ThinLV      S1ThinVG twi-a-tz--  232.59g               0.00   10.41
  S1Thin        S1disks  twi-aotz--  232.59g               2.41   11.12
  vm-100-disk-0 S1disks  Vwi-aotz--   65.00g S1Thin        4.35
  vm-101-disk-0 S1disks  Vwi-aotz--   32.00g S1Thin        8.68
  data          pve      twi-a-tz-- <757.29g               0.00   0.25
  root          pve      -wi-ao----   96.00g
  swap          pve      -wi-ao----    8.00g
  S1thin_LUN2   s1thin   twi-a-tz--  232.59g               0.00   10.41
For the LV Create process in order to use the entire volume the option -l 100%FREE should be used. The name of the LV should be specified by the -n value and then the parameter is the name of the VG we created.
The last command we need to run so we can add the Thin Storage Device is to scan for the thin LVM:
root@pve:~# pvesm lvmthinscan S1ThinVG
S1ThinLV
In the ProxMox UI go to Datacenter -> Storage -> Add -> LVM-Thin:
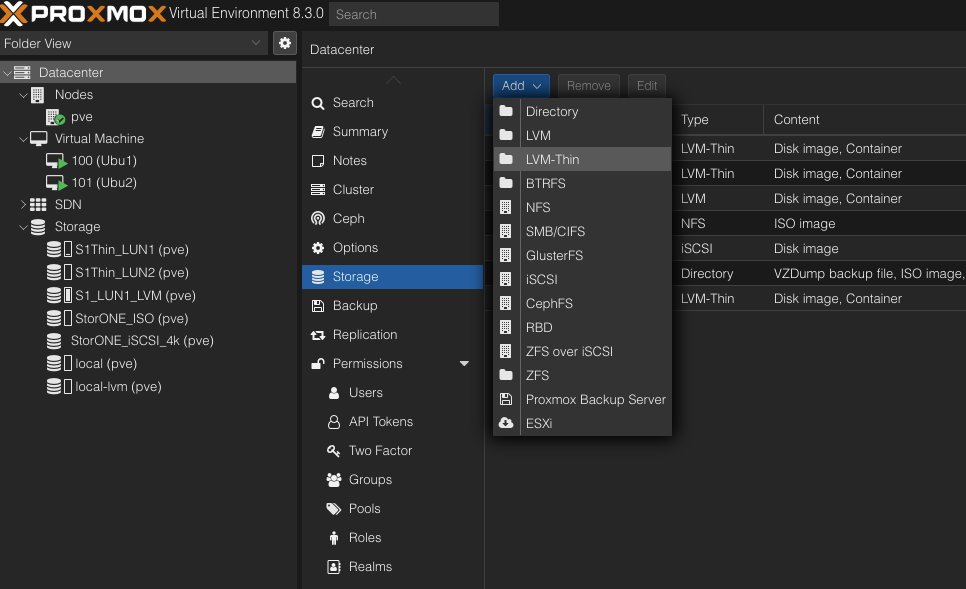
In the Add LVM-Thin dialog:
- ID - is the name of the Storage device for the inventory
- Volume Group - Should be the name of the VG you created earlier
- Thin Pool - Should be the name of the LV that you created earlier
- Content - Should default to Disk Image, Container
- Nodes - Defaults to All but can be pointed to the specific node you configured the storage on
- Enable - checked by default
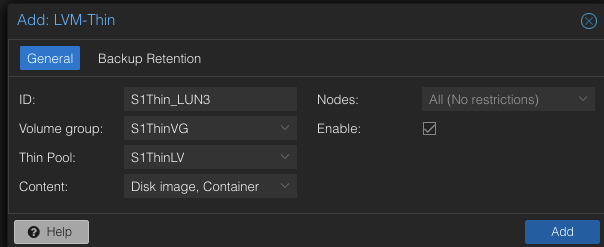
Click ADD to complete and the volume should show up in the inventory:
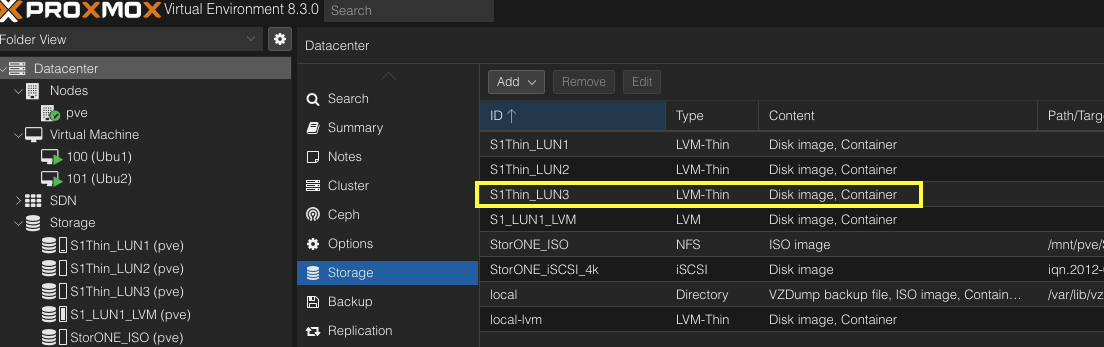
Congratulations. Your Thin-LVM is ready to be used with your ProxMox configuration.