
HDD Replacement
Summary
This KB explains how to use the StorONE CLI application to identify, remove and replace array drives These commands will require the StorONE Advanced support mode password after logging into the StorONE CLI as an administrator.
Requirements
Array administration user and
Steps
-
Identifying and ejecting the failing drive
-
Illuminating JBOD LEDs for drive replacement
-
Adding SED password (Optional)
-
Adding replacement drive to pool
-
Turning off JBOD LEDs
Identifying and removing a failed or failing drive
-
Using the CLI application, log into the array as an administrator.
-
Enter the password for “advanced support mode”
-
Enter the command: settings output --table
-
Enter the command: resource drives list to list the status, serial number, drive ID, device name, Drive vendor, model, self encrypting drive status. and drive firmware version All of this information will be needed when replacing a new drive
Example:
demo-array1 [AdvancedSupport]> resources drives list
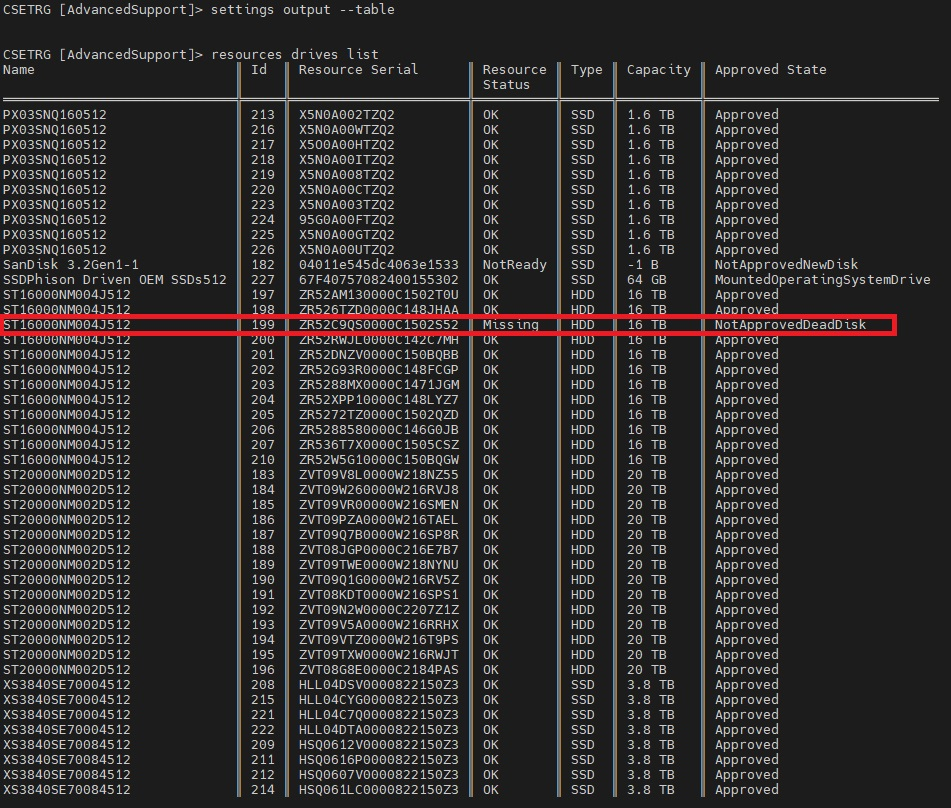
NOTE: the Resource Status: Missing
Enter command: setting output --tree
Enter command: resource drives list –details –ids <drive-ID>
Example: resource drives list –details –ids 199
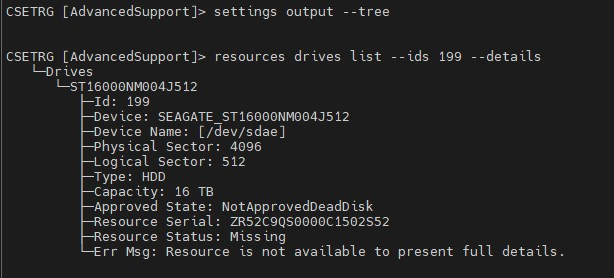
NOTE: This disk has a status of missing, meaning it is already ejected by the array and needs to be replaced.
If the disk is in the process of failing and needs to be removed from the array, then illuminating the LED and physically removing the drive is recommended. Proceed to “Illuminating LED for drive replacement” to light the correct LED to remove the drive.
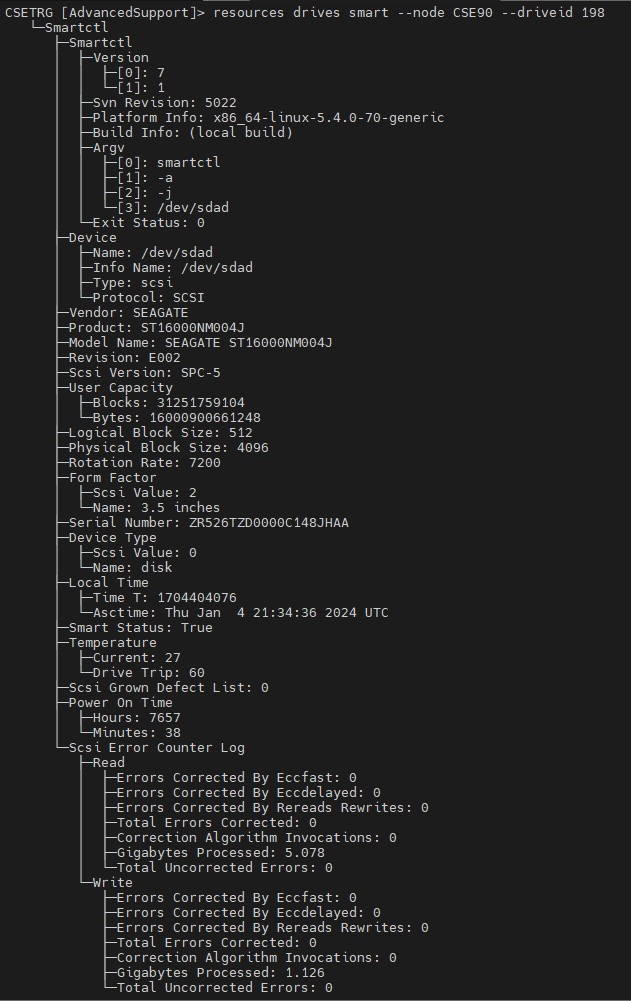
To check a drive for smart errors:
settings output --tree
resource drives smart –node <node-name> --driveid <drive-id>
Example: resource drives smart –node CSE90 --driveid 198
This will display the smart errors for the requested drive. A range of drives can also be selected with this command
Example: resource drives smart –node CSE90 --driveid 19[3-6]
The above command will return smart results for drives 193 through 196.
Illuminating JBOD LED for drive replacement
To Illuminate the JBOD light for an ejected drive.
-
resource drives led --on --driveid <drive-id>
Example: resource drives --led --ids 213

Adding SED password for replacement drive (Optional)
If SED drives are in use, and the SED is activated, then before adding the replacement drive to a pool, we must first set the SED password for the new drive.
How to determine if SED is in use
setting output --tree
nodes list --sed

If the field “Is SED Password Supplied”, is “True” then the array is using some SED capable drives.
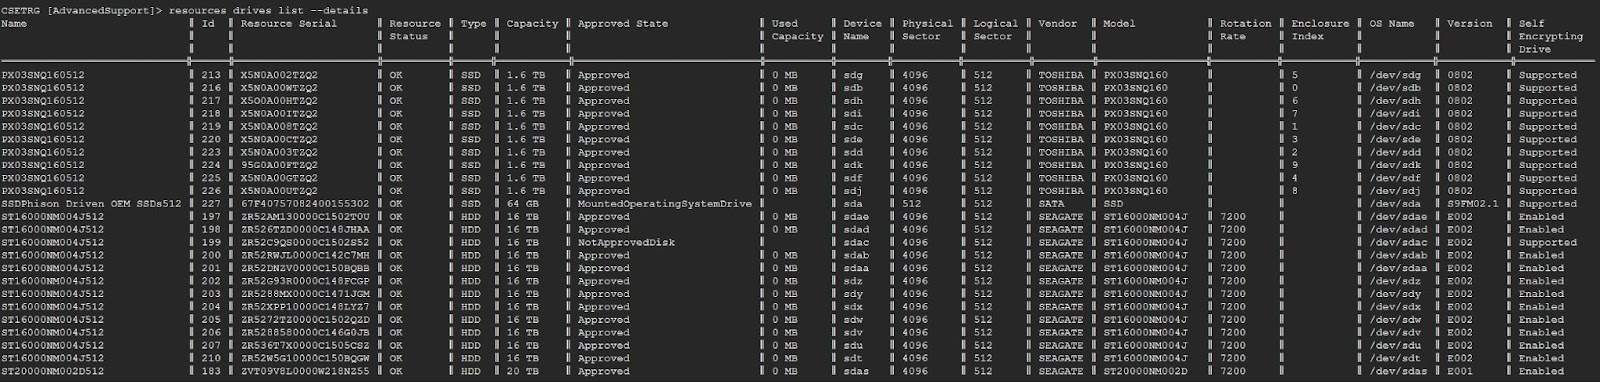
To view the drive SED status: resource drives list --details
The example below shows SED enabled for the HDD drives, since we are replacing an HDD in this example, we need to initialize the SED for the new HDD
To initialize the SED for the replaceme drive:
resources drives sed initialize --driveIds <disk-id> --password <cusstomer-password> --confirmPassword <customer-password>
Example: resource drives sed initialize --driveids 199 --password abcd1234 --confirmPassword abcd1234
Adding replacement drive to pool
With the SED initialized if used, we can now add the replacement drive to the existing pool.
To verify the drive pools in use: resource drives pool list --drives
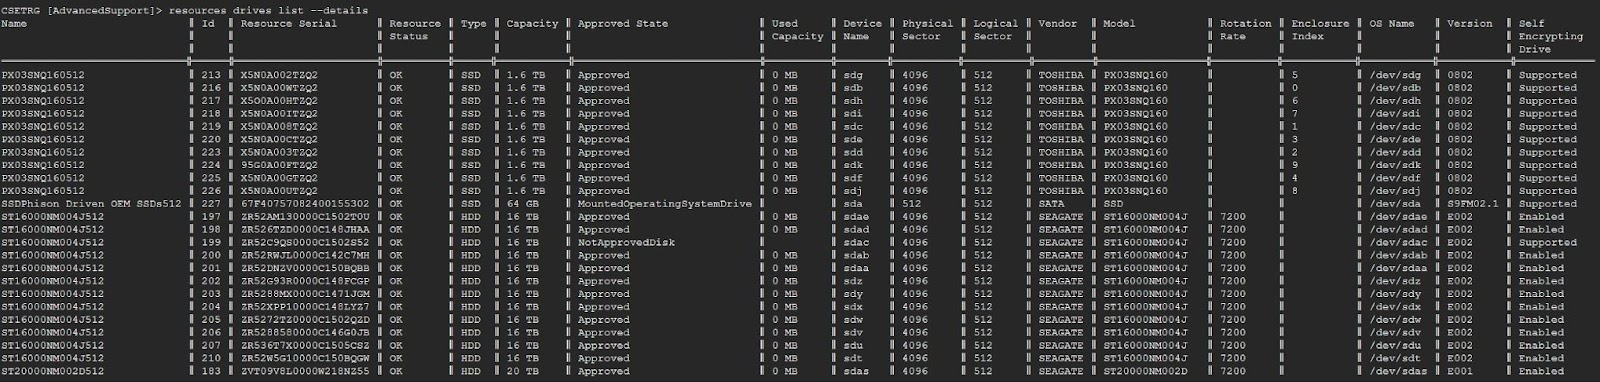
Once the desired pool is identified the following command will add the drive to a pool.
If user created (manual) drive pools are configured, the desired pool needs to be specified when approving the drive.
resource drive approve --driveIds <drive-id> --manualPool <pool-name>
Example: resources drives approve --driveIds 199 --manualPool HDD-1
Disabling JBOD LEDs after drive replacement
Once drive replacement is completed, the drive has been initialized for SED if needed, and added to the desired pool, all that is left is to disable the JBOD LEDs used to find the drive.
To check JBOD LED status for all drives
resources drives led --status
To check LED status for a single or range of drives
resources drives led --off --ids <drive-ids>
To disable JBOD LEDs:
resources drives led --off --ids <drive-id>
Example: resources drives led --off --ids 199