XCP-ng Best Practice Guide
Summary
This Best Practice Guide will instruct users on how to do the initial configuration of the Xen Cloud Platform - Next Generation (XCP-ng) to be successful when connecting to StorONE iSCSI Block Storage.
Introduction
These instructions and procedures were created while working with StorONE 3.8.0.56 and XCP-ng 8.3 and tested also with StorONE 3.7.61.x
XenServer (which XCP-ng is based on) does NOT support using more than a single IP address per subnet when connecting to iSCSI. If two initiator interfaces are desired for redundancy than two different subnets must be used.
XCP-ng configuration modifications
Multipath Configuration
As with most Linux Based Initiators it is highly recommended that definitions for the StorONE block devices be added to the multipath configuration. With XCP-ng the recommendation is to NOT change the default multipath.conf but to modify a custom configuration file that the multipathd service will employ.
Using an editor of your choosing create the following file: /etc/multipath/conf.d/storone.conf and put the following entities in that file:
defaults {
    find_multipaths             yes
    path_selector               "round-robin 0"
    path_grouping_policy        multibus
    no_path_retry               30
    max_sectors_kb              1024
    queue_without_daemon        no
    max_fds                     max
    flush_on_last_del           yes
    log_checker_err             once
}

devices {
  device {
    vendor                      "STORONE*"
    product                     "S1*"
    detect_prio                 yes
    prio                        "alua"
    path_selector               "queue-length 0"
    path_grouping_policy        group_by_prio
    failback                    immediate
    path_checker                tur
  }
}
blacklist_exceptions {
    wwid                  "36882e5a*"
}
Enable Multipathing for discovered devices:
CLI
[15:09 XenMain ~]# xe host-list
uuid ( RO)                : 0437721f-5a26-4e3d-a677-8300a803c667
          name-label ( RW): XenMain
    name-description ( RW): Default install


[15:29 XenMain ~]# xe host-param-set uuid=0437721f-5a26-4e3d-a677-8300a803c667 multipathing=true
GUI
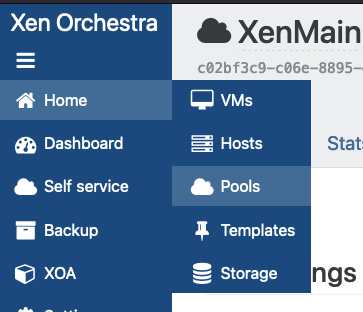
In the XOA (Xen Orchestra Appliance) go to Home -> Pools:
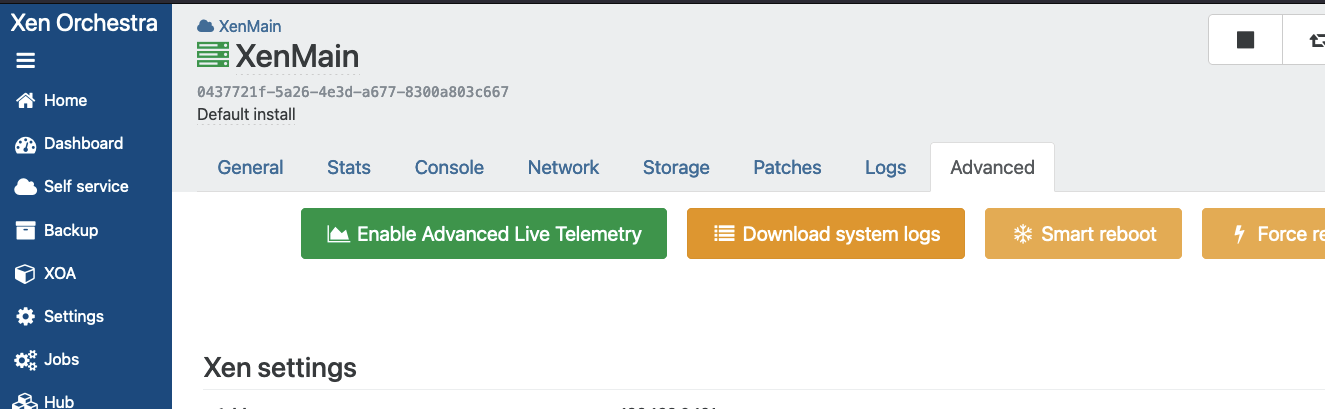
Proceed to the Advanced Tab:
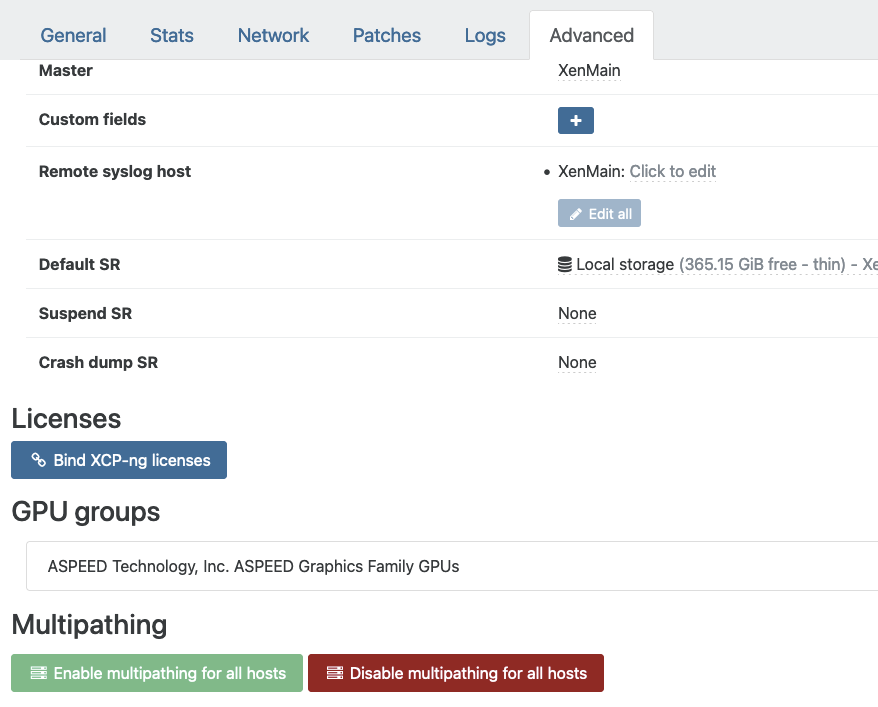
Scroll down to the Multipathing section and click on Enable multipathing for all hosts:
iSCSI Configuration
iSCSId modifications
StorONE recommends making the following modifications in the file /etc/iscsi/iscsid.conf :
node.session.timeo.replacement_timeout = 10
node.conn[0].timeo.noop_out_interval = 5
node.conn[0].timeo.noop_out_timeout = 10
node.session.nr_sessions = 4
node.session.queue_depth = 64
node.session.cmds_max = 256
(The above representation does not necessarily the order in the file)
Initiator IQN alias (optional)
The default is a random string of characters. In order to make it more unique and locatable you can set an alias to use with the storage.
xe host-param-set uuid=<your UUID> other-config:iscsi_iqn=iqn.2025-01.XenMain(The UUID will autofill by using tab completion. The iqn name can be whatever you want as long as it starts with iqn. )
Networking Configuration
If you are using JUMBO frames you will need to modify the MTU of the physical device. It is also recommended that you use a dedicated interface and subnet for your iSCSI connections.
MTU
In order to modify the MTU you need to location the network-uuid of the device you intend to use for iSCSI traffic. Below is an example of the output showing eth7's information:
[09:10 XenMain iscsi]# xe pif-list

uuid ( RO)                  : 55f80088-f587-882a-2345-f78d782ad048
                device ( RO): eth7
                   MAC ( RO): 3c:ec:ef:da:97:15
    currently-attached ( RO): true
                  VLAN ( RO): -1
          network-uuid ( RO): 4cdc2eee-6e0b-1175-89a6-7f121779ab76
             host-uuid ( RO): 0437721f-5a26-4e3d-a677-8300a803c667
(the output has been truncated for this document)
Using the network-uuid from the output of xe pif-list you can use the following command to change the MTU to use JUMBO frames:
[09:19 XenMain iscsi]# xe network-param-set uuid=4cdc2eee-6e0b-1175-89a6-7f121779ab76 MTU=9000You can verify this by checking with ip a or checking via the xe commands:
[09:22 XenMain iscsi]# xe network-param-get uuid=4cdc2eee-6e0b-1175-89a6-7f121779ab76 param-name=MTU
9000
Static IP for the interface:
To set the static IP on the proper device we are going to use the same output from xe pif-list that was used when we set the MTU. This time we are going to use the UUID :
[09:23 XenMain iscsi]# xe pif-reconfigure-ip uuid=55f80088-f587-882a-2345-f78d782ad048 IP=10.10.0.121 netmask=255.255.255.0 mode=static The System should be rebooted at this point.
Adding iSCSI Storage from Storone
As of the creation of this document XCP-ng's latest version is 8.3. There has been information stating that block volumes utilizing 4k sector sizes would be supported in this release but our testing has shown some problems with using 4k sector size volumes. As a result it is recommended that you create volumes using a 512b sector size much as is required by VMware.
StorONE Configuration
Information on creation volumes is detailed on our documentation site. Some of the pages such as: StorONE 3.8 - Create Volumes or contained within StorONE 3.8 Documentation - Web Application Interface
Some of the key details you will need are the initiator IQN from the XCP-ng server. This will either be the alias you created before or you can locate the information from the server using the following commands:
[15:08 XenMain ~]# xe host-list
uuid ( RO)                : 0437721f-5a26-4e3d-a677-8300a803c667
          name-label ( RW): XenMain
    name-description ( RW): Default install

[15:09 XenMain ~]# xe host-param-get uuid=0437721f-5a26-4e3d-a677-8300a803c667 param-name=other-config
agent_start_time: 1736278074.; boot_time: 1736278002.; rpm_patch_installation_time: 1736261703.129; iscsi_iqn: iqn.2025-01.XenMain
In the above example you are using the UUID of the host to query the "other-config" to display the IQN. This is what you will use for configuring the IQN in the HOST section of the StorONE software.
GUI
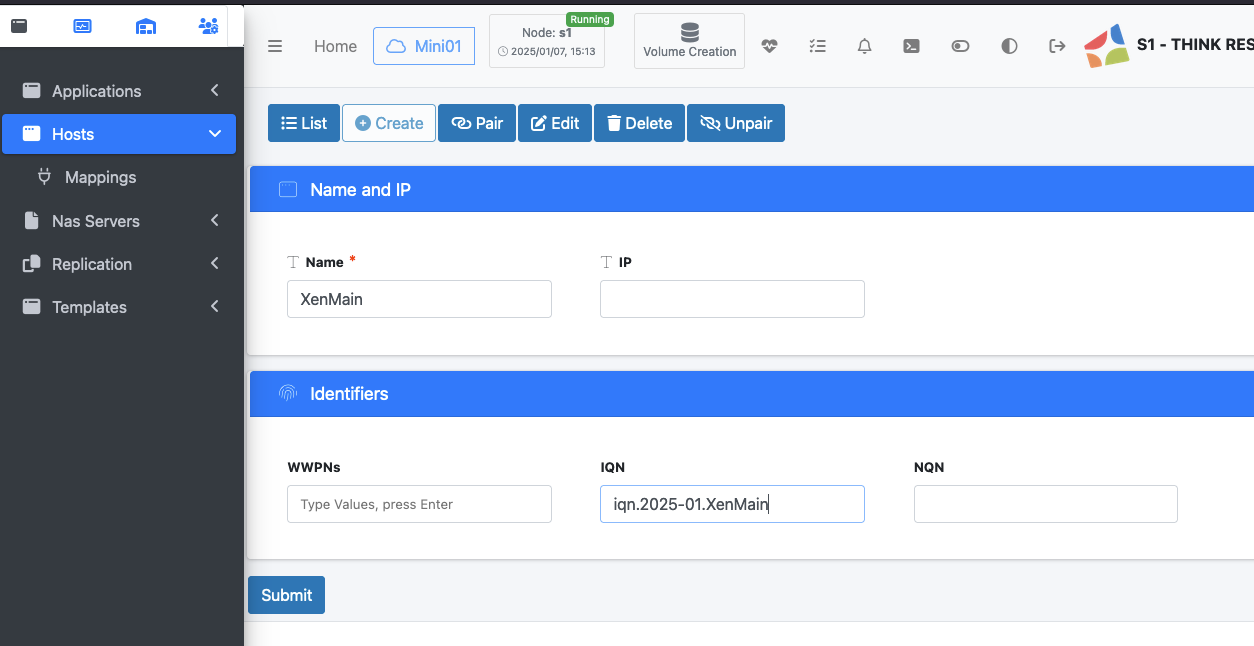
As seen above: Under Application/Volumes -> Hosts -> Create provide the name of your server and the IQN we discovered earlier.
if you hit tab or leave the IQN field to hit submit the other two fields will be removed from the screen. Just hit submit to create the HOSTS entry
Now you can use create the volume using the Volume Creation Wizard at the top of the UI

And when it comes time to Map the volume you can use the new host you just created and provide a LUN ID.
CLI
From the s1cli we can create the hosts entry and the volume by doing the following:
Mini01> hosts create XenMain --iqn iqn.2025-01.XenMain

Mini01> applications volumes create --application XenServer --volume SRexample --capacity 250G --n 2 --k 1 --pool SSD --sectorSize 512b

Mini01> applications mappings add --application XenServer --volumes SRexample  --hosts XenMain --lunIds 7
You should now have a LUN available to mount on the XCP-ng Server
XCP-ng Device Discovery
GUI
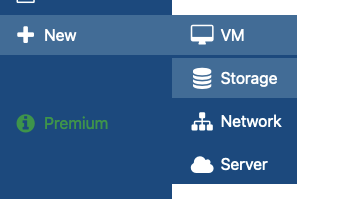
Go to New -> Storage
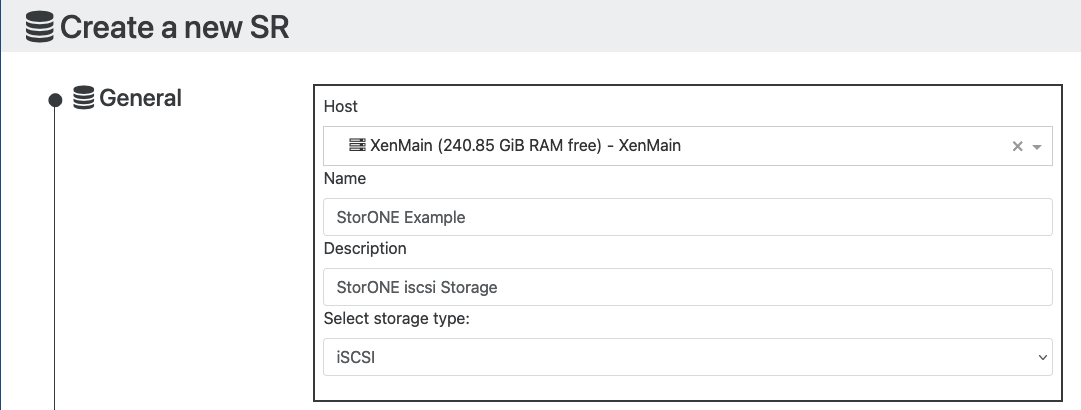
In the next dialog that opens choose your Host and provide a Name and Description that is appropriate for the SR and then under Storage Type choose iSCSI:
In the next section provide your target IP for the StorONE along with the default port (3260) and click on the magnifying glass:
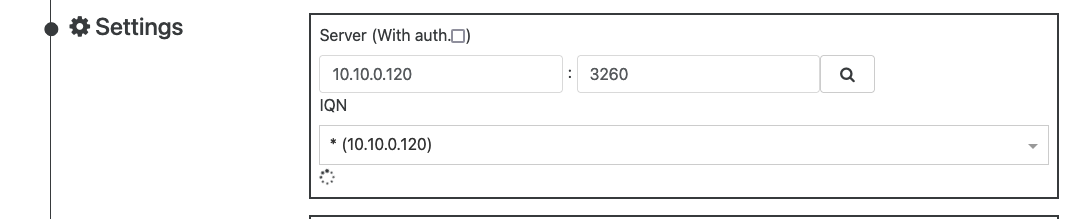
Under IQN select the * option in the above dialog. The window should expand to show you a selection for LUN:
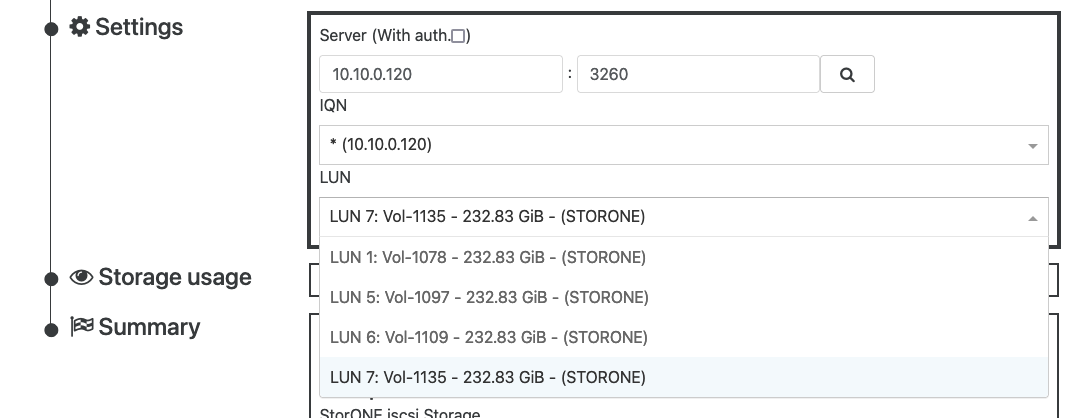
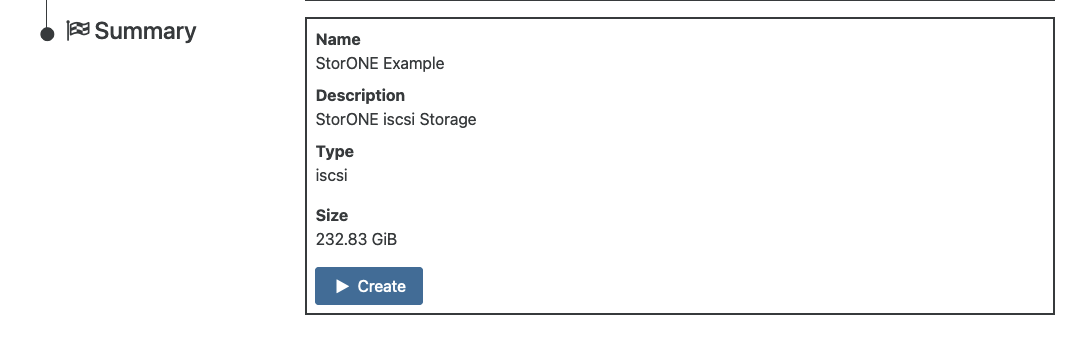
Once you choose the LUN you created/want to connect to the Summary information should expand and provide a CREATE button:
The window should switch to the Storage Screen showing the SR when complete:
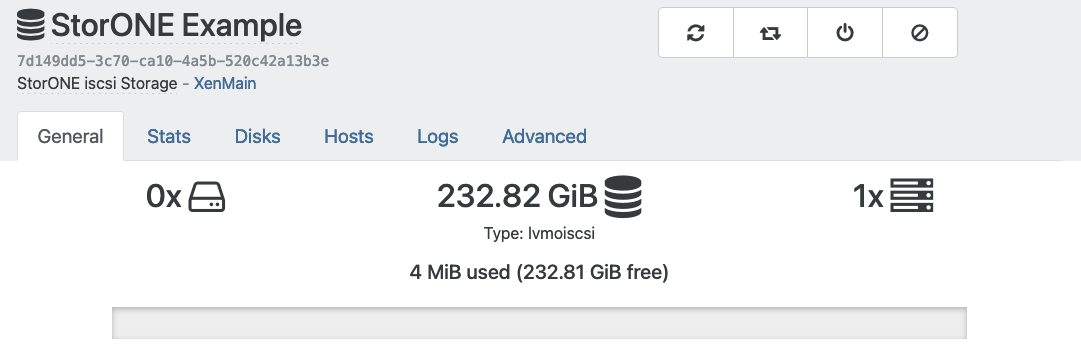
The SR should be available for use now
CLI
To create an SR from the XCP-ng CLI you can ssh to the main server and use the following commands:
[16:18 XenMain ~]# xe sr-probe device-config:target=10.10.0.120 type=lvmoiscsi device-config:targetIQN=iqn.2012-01.com.storone:5882e5a-0001-0001
<iscsi-target>
	<LUN>
		<vendor>STORONE</vendor>
		<serial>Vol-1078</serial>
		<LUNid>1</LUNid>
		<size>250000003072</size>
		<SCSIid>36882e5a0000000010000000000000436</SCSIid>
	</LUN>
	<LUN>
		<vendor>STORONE</vendor>
		<serial>Vol-1097</serial>
		<LUNid>5</LUNid>
		<size>250000003072</size>
		<SCSIid>36882e5a0000000010000000000000449</SCSIid>
	</LUN>
	<LUN>
		<vendor>STORONE</vendor>
		<serial>Vol-1109</serial>
		<LUNid>6</LUNid>
		<size>250000003072</size>
		<SCSIid>36882e5a0000000010000000000000455</SCSIid>
	</LUN>
	<LUN>
		<vendor>STORONE</vendor>
		<serial>Vol-1135</serial>
		<LUNid>7</LUNid>
		<size>250000003072</size>
		<SCSIid>36882e5a000000001000000000000046f</SCSIid>
	</LUN>
	<LUN>
		<vendor>STORONE</vendor>
		<serial>Vol-1142</serial>
		<LUNid>9</LUNid>
		<size>250000003072</size>
		<SCSIid>36882e5a0000000010000000000000476</SCSIid>
	</LUN>
</iscsi-target>
Using the xe sr-probe command we can find the SCSIid for the LUN we want to add. In this example we want to add LUN 9:
[16:19 XenMain ~]# xe sr-create type=lvmoiscsi device-config:target=10.10.0.120 device-config:targetIQN=* device-config:SCSIid=36882e5a0000000010000000000000476 name-label="StorONE SR LUN9"
9cd95a63-184d-47a2-735c-de4dd259e1aa

[16:22 XenMain ~]# xe sr-list uuid=9cd95a63-184d-47a2-735c-de4dd259e1aa
uuid ( RO)                : 9cd95a63-184d-47a2-735c-de4dd259e1aa
          name-label ( RW): StorONE SR LUN9
    name-description ( RW):
                host ( RO): XenMain
                type ( RO): lvmoiscsi
        content-type ( RO):

[16:23 XenMain ~]# xe pbd-list sr-uuid=9cd95a63-184d-47a2-735c-de4dd259e1aa
uuid ( RO)                  : 381eac06-500d-7c13-6c9a-e89a32549b66
             host-uuid ( RO): 0437721f-5a26-4e3d-a677-8300a803c667
               sr-uuid ( RO): 9cd95a63-184d-47a2-735c-de4dd259e1aa
         device-config (MRO): multiSession: 10.10.0.120,3260,iqn.2012-01.com.storone:5882e5a-0001-0001|; target: 10.10.0.120; targetIQN: *; SCSIid: 36882e5a0000000010000000000000476; multihomelist: 10.10.0.120:3260
    currently-attached ( RO): true
In the above example we use the xe sr-create command to create the new SR and then the subsequent command to ensure it was created and mounted.
Your SR should be mounted and ready to use
StorONE HA (dual node configuration)
In the case of using a dual node StorONE configuration you will have to add the discovery information from the CLI/Shell. This will require that you have the second node's IP address available. The command will look like this:
iscsiadm -m discovery -t sendtargets -p <target IP>
In the following example in the UI we've already connected a LUN to target 10.10.50.130. Now we want to add the second node's IP of 10.10.50.130:
[16:16 xcp ~]# iscsiadm -m discovery -t sendtargets -p 10.10.50.131
10.10.50.131:3260,1 iqn.2012-01.com.storone:5882e5a-0002-0004

[16:18 xcp ~]# iscsiadm -m node -l
Logging in to [iface: default, target: iqn.2012-01.com.storone:5882e5a-0002-0004, portal: 10.10.50.131,3260] (multiple)
Logging in to [iface: default, target: iqn.2012-01.com.storone:5882e5a-0002-0004, portal: 10.10.50.131,3260] (multiple)
Logging in to [iface: default, target: iqn.2012-01.com.storone:5882e5a-0002-0004, portal: 10.10.50.131,3260] (multiple)
Logging in to [iface: default, target: iqn.2012-01.com.storone:5882e5a-0002-0004, portal: 10.10.50.131,3260] (multiple)
Login to [iface: default, target: iqn.2012-01.com.storone:5882e5a-0002-0004, portal: 10.10.50.131,3260] successful.
Login to [iface: default, target: iqn.2012-01.com.storone:5882e5a-0002-0004, portal: 10.10.50.131,3260] successful.
Login to [iface: default, target: iqn.2012-01.com.storone:5882e5a-0002-0004, portal: 10.10.50.131,3260] successful.
Login to [iface: default, target: iqn.2012-01.com.storone:5882e5a-0002-0004, portal: 10.10.50.131,3260] successful.

[16:19 xcp conf.d]# multipath -ll
mpatha (36882e5a0000000020000000000000d45) dm-2 STORONE ,S1
size=233G features='1 queue_if_no_path' hwhandler='0' wp=rw
|-+- policy='queue-length 0' prio=50 status=active
| |- 17:0:0:1 sdg 8:96  active ready running
| |- 18:0:0:1 sdh 8:112 active ready running
| |- 19:0:0:1 sdi 8:128 active ready running
| `- 20:0:0:1 sdj 8:144 active ready running
`-+- policy='queue-length 0' prio=10 status=enabled
  |- 13:0:0:1 sdc 8:32  active ready running
  |- 14:0:0:1 sdd 8:48  active ready running
  |- 15:0:0:1 sde 8:64  active ready running
  `- 16:0:0:1 sdf 8:80  active ready running
NFS Considerations for StorONE
For NFS StorONE recommends making the following changes to the NFS options while creating the new SR:
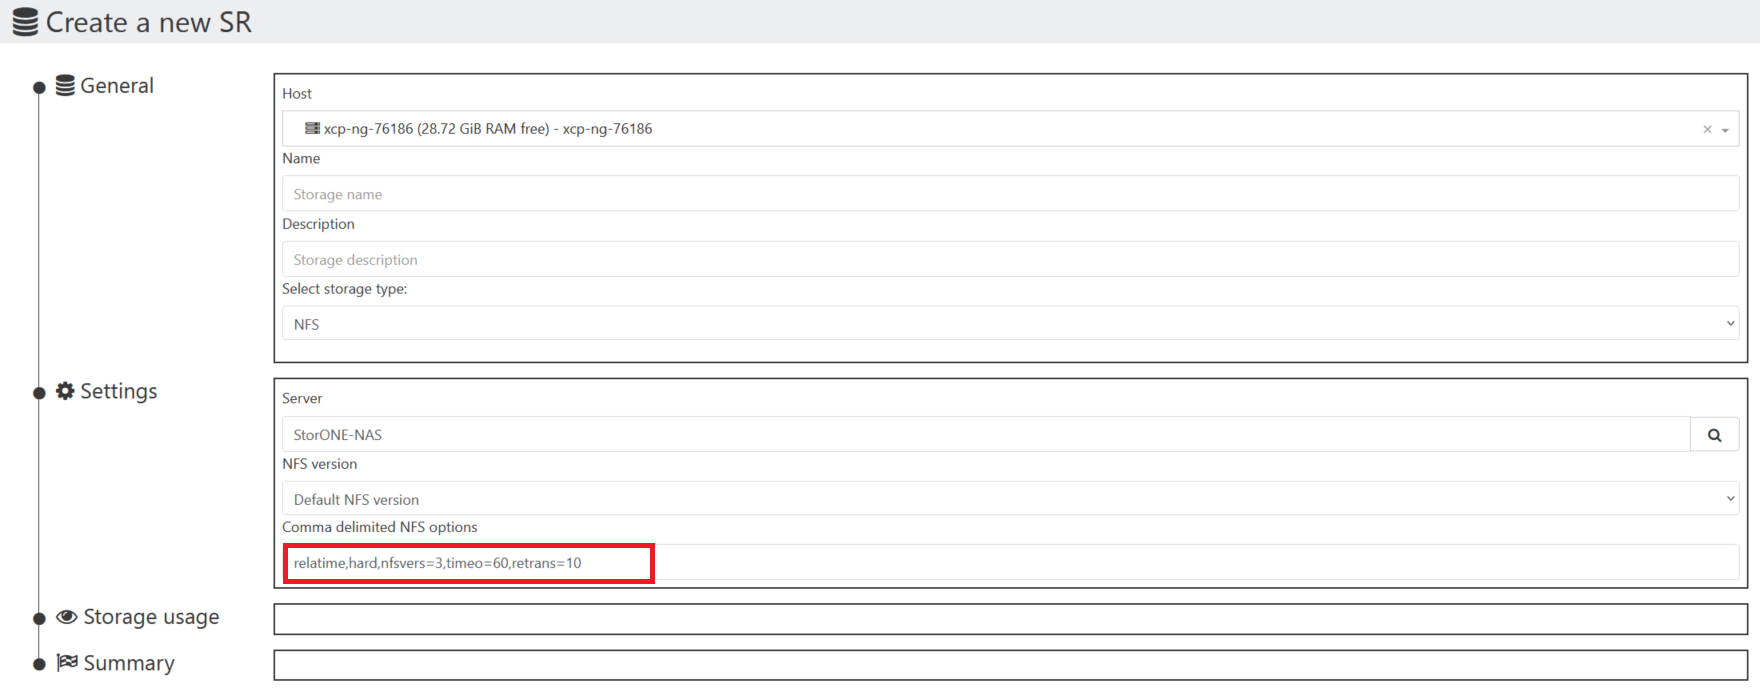
Under Settings for the Comma Delimited NFS options add:
relatime,hard,nfsvers=3,timeo=60,retrans=10
No comments to display
No comments to display