
ProxMox Best Practice Guide <WIP>
Summary
This Best Practice Guide will instruct users on how to do the initial configuration for the ProxMox Virtual Environment (PVE) to ensure a successful deployment with the StorONE Storage System
Introduction
These instructions and procedures were created while working with StorONE 3.8.0.56 and PVE 8.3
PVE System Configurations
Block Volume Considerations
Unlike some other hypervisors ProxMox is allowing the use of 4k Sector Volumes with block storage.
iSCSI Configuration
It is recommended that you make modifications to the iSCSI configuration in order to have the best experience when connecting to the StorONE Storage Appliance. Using SSH or the Console in the ProxMox UI access the system CLI and edit the file located at /etc/iscsi/iscsid.conf and ensure the following options are set accordingly:
node.startup = automatic
node.session.timeo.replacement_timeout = 10
node.conn[0].timeo.noop_out_interval = 5
node.conn[0].timeo.noop_out_timeout = 10
node.session.nr_sessions = 4
node.session.queue_depth = 64
node.session.cmds_max = 256
Once modified the service should be restarted:
service iscsid restart
Multipathing IO - MPIO
ProxMox does not have Multipathing installed by default. It must be added by logging into the ProxMox CLI and running the following commands:
apt-get update
aot-get install multipath-tools
create /etc/multipath.conf
defaults {
    find_multipaths yes
    user_friendly_names yes
    path_selector "round-robin 0"
    path_grouping_policy multibus
    no_path_retry 30
    max_sectors_kb      1024
    queue_without_daemon no
    max_fds max
    flush_on_last_del yes
    log_checker_err once
}
devices {
  device {
    vendor "STORONE*"
    product "S1*"
    detect_prio yes
    prio "alua"
    path_selector "queue-length 0"
    path_grouping_policy group_by_prio
    failback immediate
    path_checker tur
  }
}
blacklist {
  wwid ".*"
}
blacklist_exceptions {
    wwid                  "36882e5a*"
}
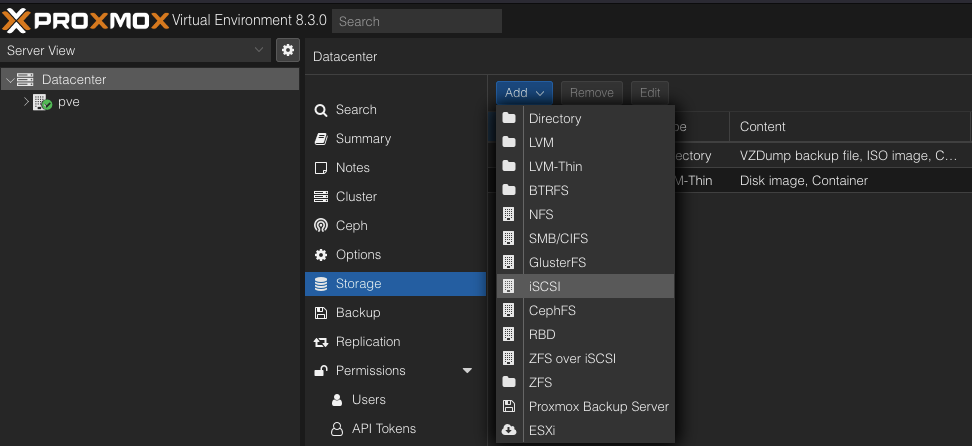
Adding iSCSI Storage from the StorONE
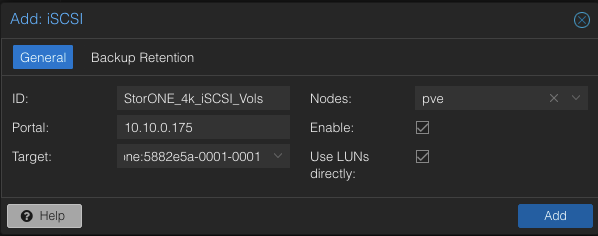
In the Add iSCSI dialog:
-
- ID - a recognizable name for the inventory
- Portal - the discovery ip of the iSCSI target from the StorONE software
- Target - this should auto-populate after supplying the Portal IP
- this can also be discovered in the StorONE CLI or GUI
- CLI - nodes list --gateay
- GUI - Inventory -> Nodes + Gateway Checkbox -> Submit
- this can also be discovered in the StorONE CLI or GUI
- Nodes: Optional but will default to ALL within the datacenter
- Enable: should be checked by default
- Use LUNs Directly: Checked by default and is comparable to using a LUN(s) like an RDM (RAW Device Mapping) in other hypervisors
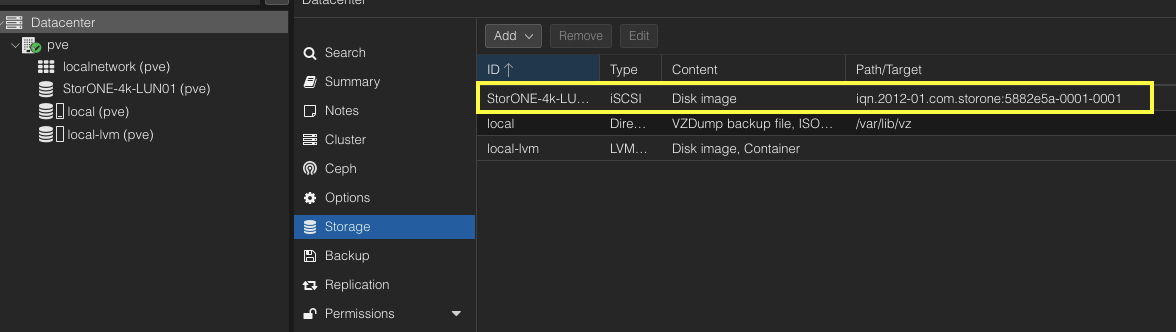
The above process adds the discovery for the StorONE iSCSI target. The name used here will be displayed for ALL LUNs discovered. The use or applications of individual LUNs will be applied in other contexts.
The LUN should appear in the Storage list:
From the ProxMox CLI/Console verify that all the expected paths are seen:
root@pve:/etc/iscsi# multipath -ll
mpatha (36882e5a0000000010000000000000507) dm-5 STORONE,S1
size=233G features='1 queue_if_no_path' hwhandler='1 alua' wp=rw
`-+- policy='queue-length 0' prio=50 status=active
  |- 19:0:0:1 sdh 8:112 active ready running
  |- 18:0:0:1 sdg 8:96  active ready running
  |- 17:0:0:1 sdf 8:80  active ready running
  `- 20:0:0:1 sdi 8:128 active ready running
If you add a LUN while the system is up and already configured you can rescan with the following command: iscsiadm -m node -I default -T iqn.2012-01.com.storone:5882e5a-0001-0001 -p 10.10.0.175 -R (you may have to run it twice to discovery the LUN)
At this stage we can use the LUN(s) as-is as an RDM. Using the volume this way would provide access to a single VM. To use the Volume/LUN for multiple VMs proceed to applying an LVM
LVM applied to discovered LUN:
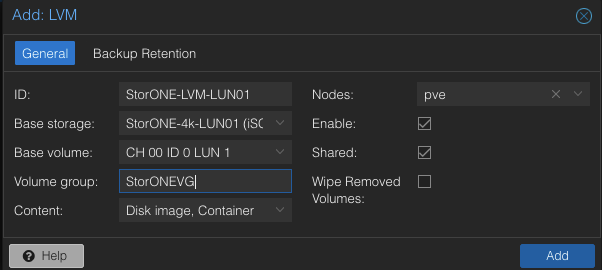
In the ProxMox UI proceed to Datacenter -> Storage -> Add -> LVM
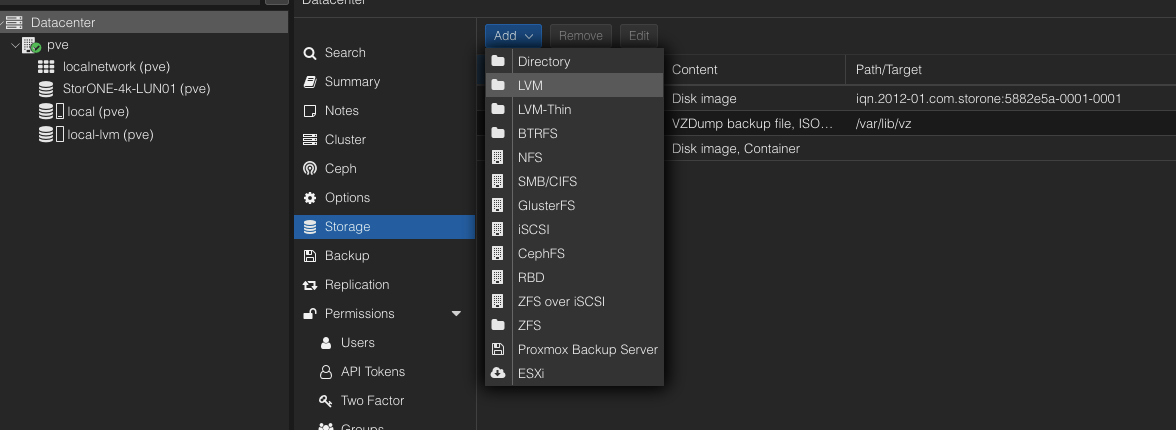
In the Add LVM dialog:
-
-
- ID - an identifiable name for the inventory
- Base Storage - Select the StorONE Storage Device created in the previously step
- Base Volume - Select the LUN ID you want to apply the LVM
- Volume Group - a required field that can be named anything
- Content - By default Disk Image, Container. In most cases this default should be sufficient
- Nodes - Set to ALL by default and can be directed to an individual server
- Enabled - checked by default
- Shared - Unchecked by default but can be selected if the LVM is being deployed on a shared LUN.
- Wipe Removed Volumes - Unchecked by default. Also referred to as Safe Remove. This ensures that in the event of the removal of a volume the data will be "zeroed" out
-
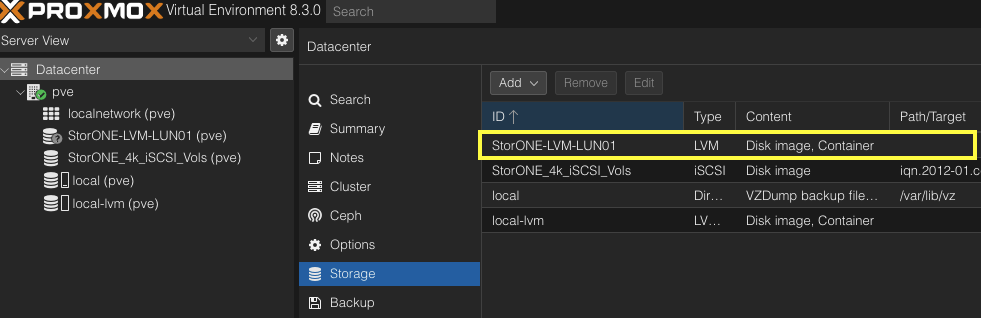
The new LVM should appear in the Storage Inventory:
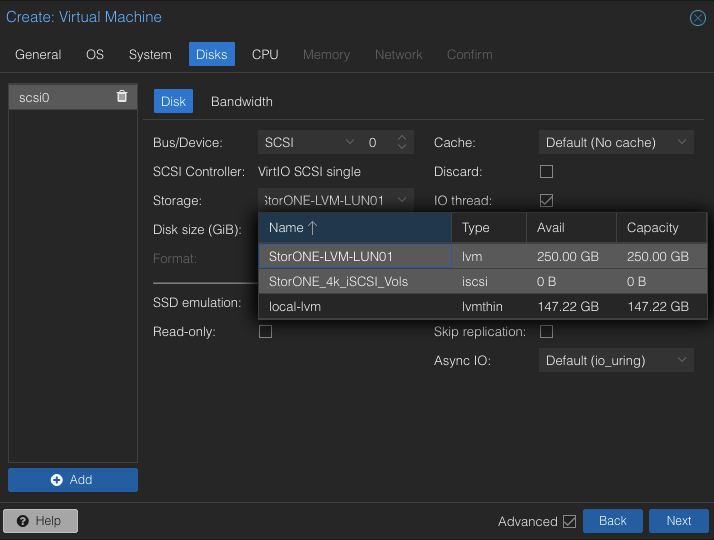
Applying the devices to VMs
Both the RAW device and the LVM will now display in the Storage option when creating a VM:
In the VM creation if you chose to use an RDM you will select the StorONE iSCSI device and then select the LUN to use
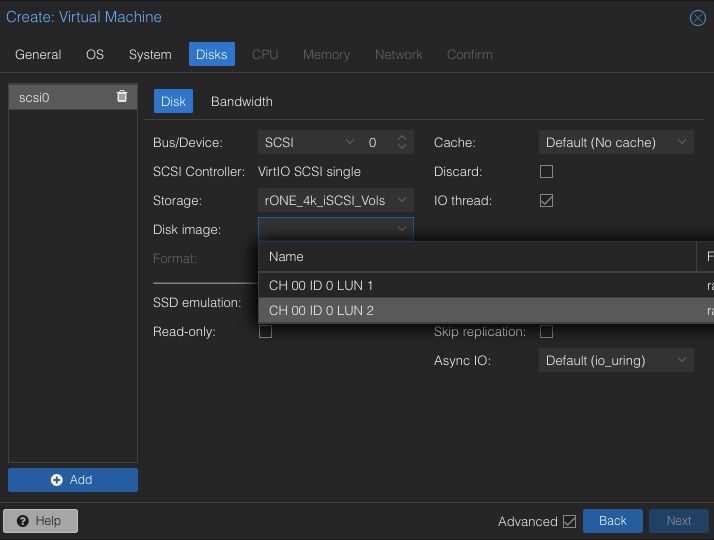
Do NOT use the same LUN for both RDM activities and LVM activities.
Adding NFS Storage From StorONE
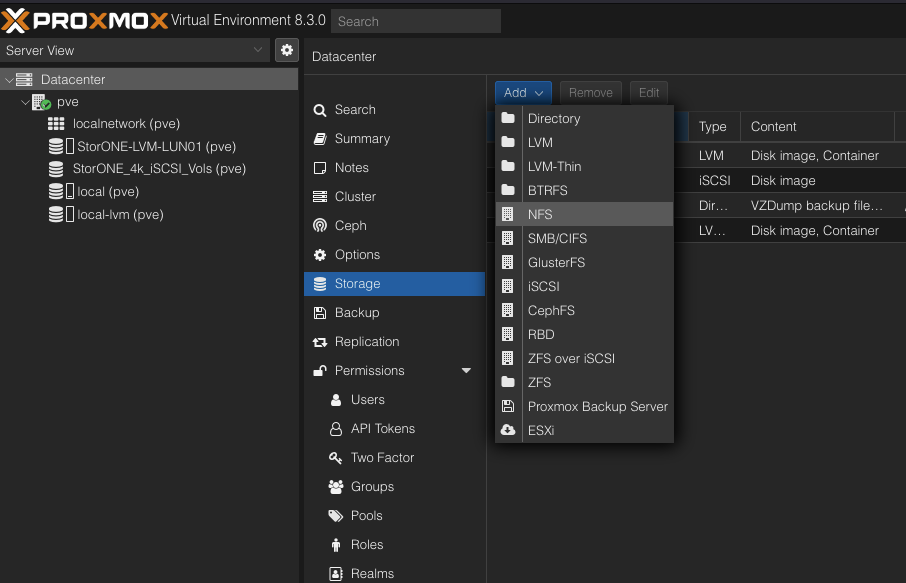
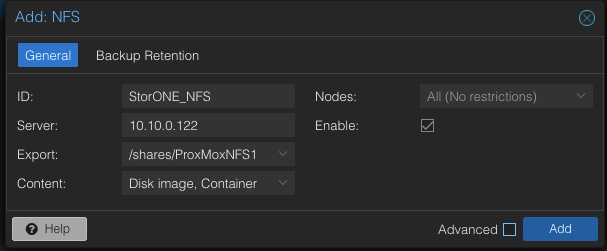
In the Add NFS dialog:
-
- ID - a name to allow you to locate the StorONE NFS device in the Storage Inventory
- Server - The IP of the floating address of the StorONE NAS Server
- Export - Should auto-populate the names of shares available at the Server IP you supplied
- Note: Only choose the name of the share that was created. Do NOT use the path that looks like
/volume/Vol-XXX/exports
- Note: Only choose the name of the share that was created. Do NOT use the path that looks like
- Content - Defaults to Disk Image. You can add other options as fits the needs of this storage device
- Nodes - defaults to ALL. Can be specified for a specific server in the datacenter
- Enable - checked by default
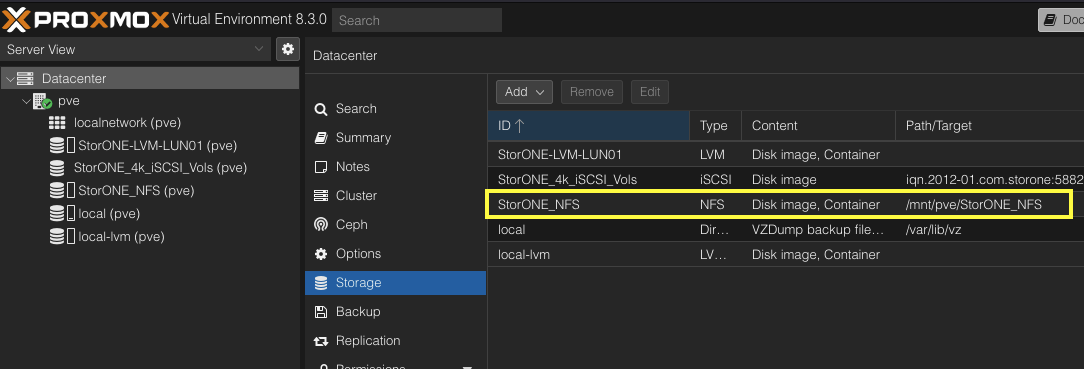
The new NFS storage device appears in the Storage Inventory:
Congratulations. You should now have full access to the StorONE devices to work with ProxMox