Veeam Backup and Replication Best Practice Guide <WIP>
This is a work in progress
Summary
This document is intended to provide the best practices for using Veeam's Backup and Replication product with the StorONE Storage Appliance Software to Backup, Restore, and Replication Virtual Machines.
Requirements / Recommedations
StorONE
The testing used to create this document was completed using StorONE version 3.8.0.66. Later versions of the StorONE code can be applied to this process as well.
Protocols
StorONE has been certified to be used with Veeam with the following protocols:
-
-
-
-
-
- CIFS/SMB - VeeamReady StorONE SMB Repository
- NFS - VeeamReady StorONE NFS Repository
- iSCSI - VeeamReady StorONE iSCSI Repository
-
-
-
-
N+K Settings
<TBD> Will note that 8+X is not needed for Veeam to be performant
Snapshots/Retention
<TBD>
Recommendations of things NOT to do
It is StorONE's recommendation to avoid using VMDK or RDM storage for the creation of Veeam Storage Repositories
Veeam
Direct Connect Volumes
For direct mounted (block) volumes (StorONE volumes presented directly to the Veeam Server) Veeam has specific recommendations for formatting and block size ( Veeam's Backup and Replication Best Practices )
Windows
Windows 2k19+ use ReFS with 64KB block size
Linux
Format volumes with XFS and 4KB block size
3-2-1 Backup Rule
Veeam Blog Post Regarding the 3-2-1 Backup Rule
Veeam Community Blog Post about the 3-2-1-1-0 "Golden Backup Rule"
Summary of the 3-2-1 method/rule
-
-
-
-
-
-
- Maintain at least 3 copies of your data
- Store your backups on at least 2 different medias / storage devices
- Store at least 1 copy in an offsite location
-
-
-
-
-
The additional 1-0 added as technology has advanced
-
-
-
-
-
-
- 1 Offline or "air-gapped" copy (such as a StorONE snapshot)
- 0 errors after a backup recovery verification (which can be done with SureBackup)
-
-
-
-
-
Setup
Overview
3 Copies
-
-
-
-
- 1 Backup on a Primary Storage Array
- 1 Backup Copy on a Secondary Storage Array
- 1 Replication Job to an alternate location
- replicated to a third Storage Array
-
-
-
2 Different Media
-
-
-
-
- 1 Primary Storage Array
- This can be StorONE or another vendor
- 1 Secondary Storage Array
- A StorONE Storage Appliance
- 1 Primary Storage Array
-
-
-
1 Offsite Copy
-
-
-
-
- The replicated copy is to another site, datacenter, and storage
- Requires another ESX destination
- Requires a third storage array
- The replicated copy is to another site, datacenter, and storage
-
-
-
1 Offline Copy
-
-
-
-
- the 3-2-1-1-0 method is technically calling for the offline copy to be on removable media. In this scenario the Replicated copy can remain offline until/if needed
-
-
-
0 Errors
-
-
-
-
- Configure a SureCopy Veeam job to verify/test the primary backup which will be the basis for the BackupCopy and Replication jobs.
-
-
-
Copy 1 / 1st Media device
Your primary backup copy is on One Storage array. In these examples, the primary is on StorONE but can also be on another vendor.
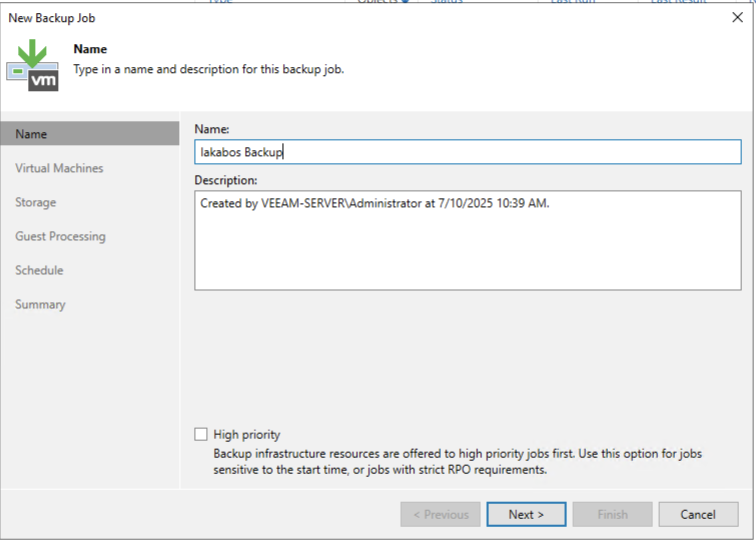
Create the Backup Job and name it:
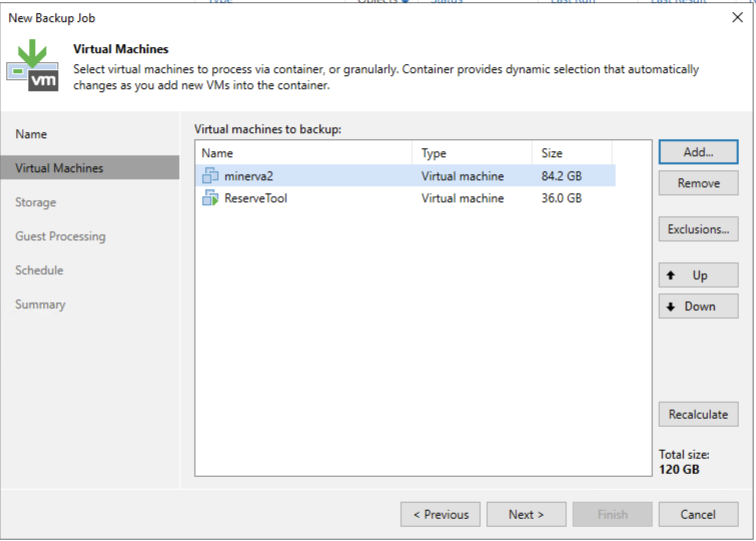
Add your virtual machines to the job:
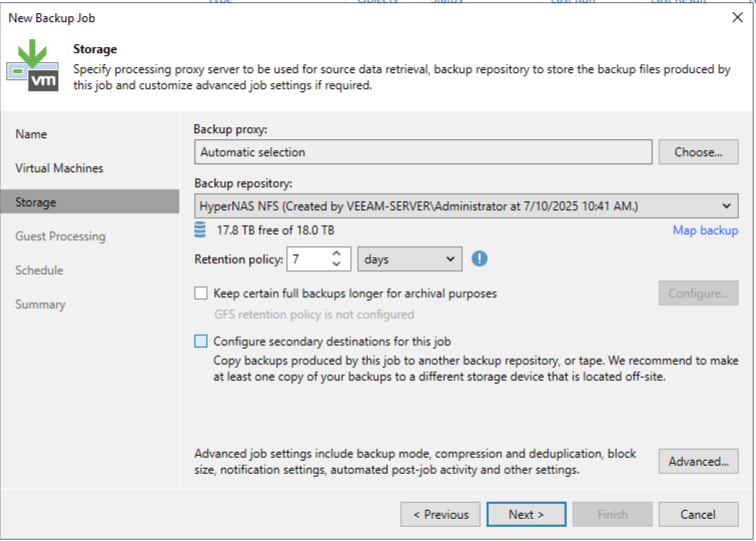
Next you should select your storage repository. This is the 1st of the 2 media /storage devices that are recommend
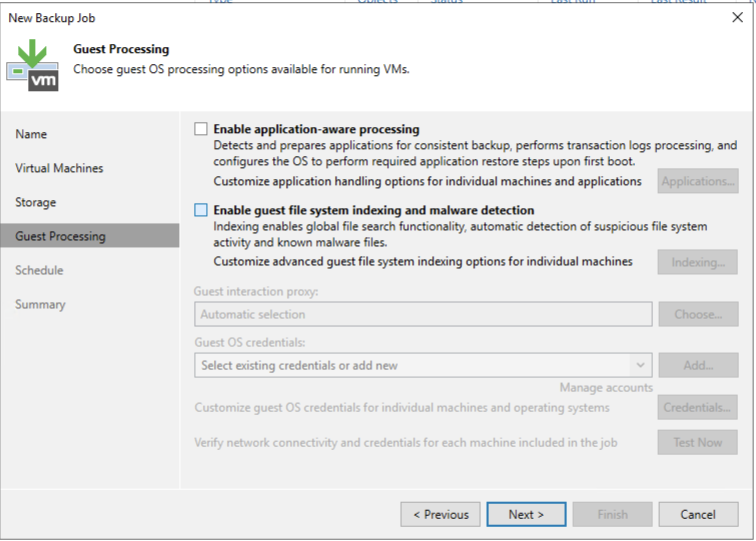
The next screen is optional and dependent on the types of VMs and backup jobs you've created
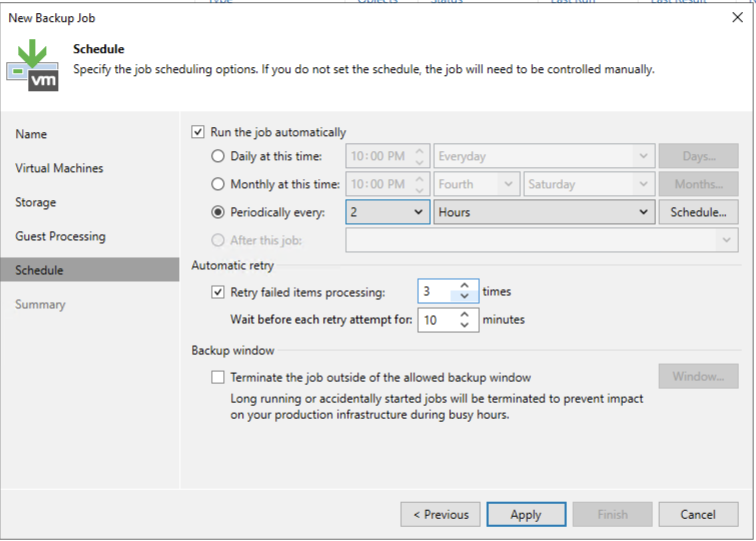
Next setup the schedule that you want your VMs to backup to
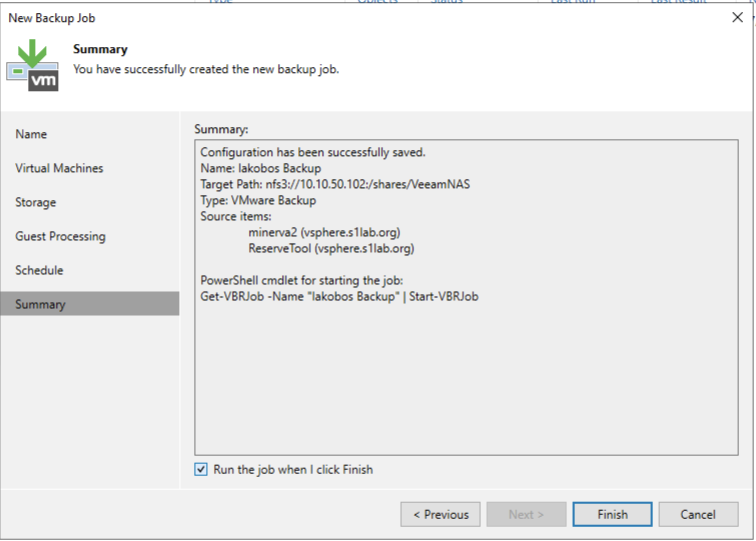
Verify your settings and then choose to run the job when you finish (or let it run as scheduled)
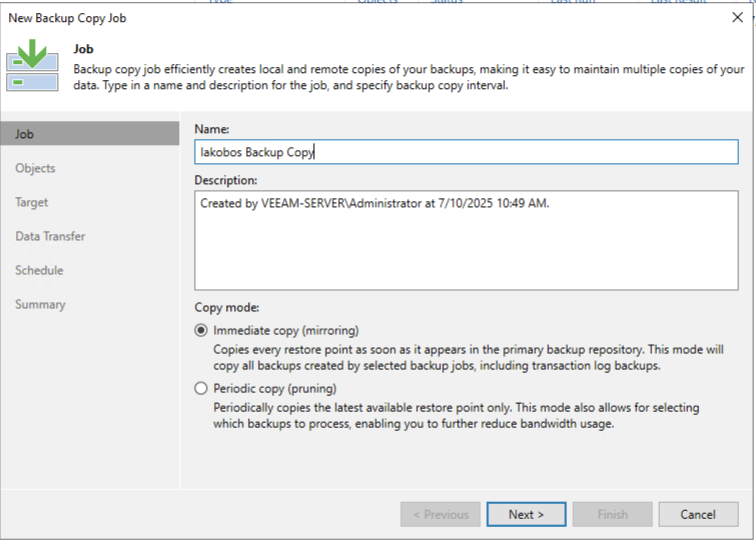
Copy 2 / 2nd Media Device
Create a Backup Copy Job and choose the copy mode
In the next section you want to choose the Objects that you want to make a Backup Copy from. Choose from the job that you created for the 1st Copy
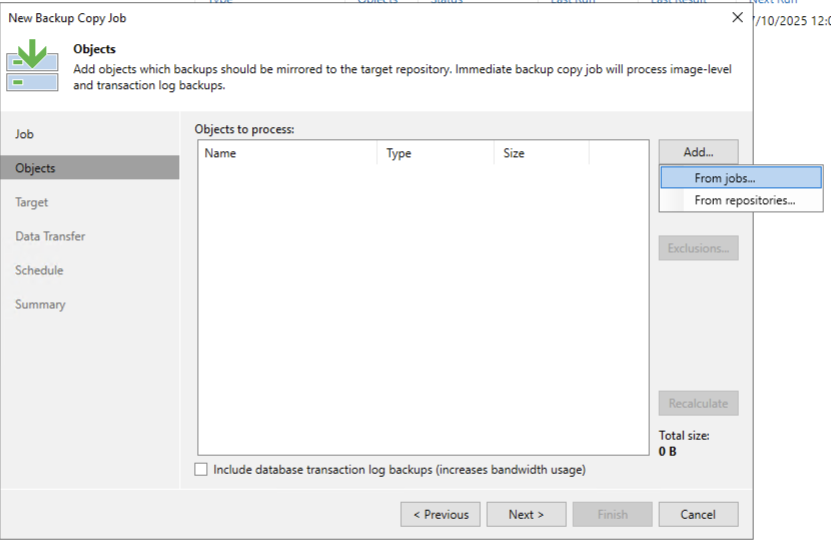
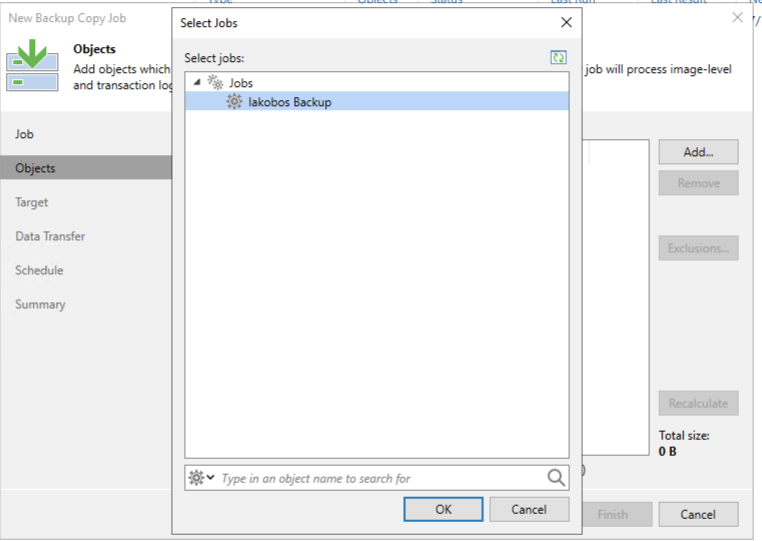
Next select the backup repository that represents the 2nd media device to backup to
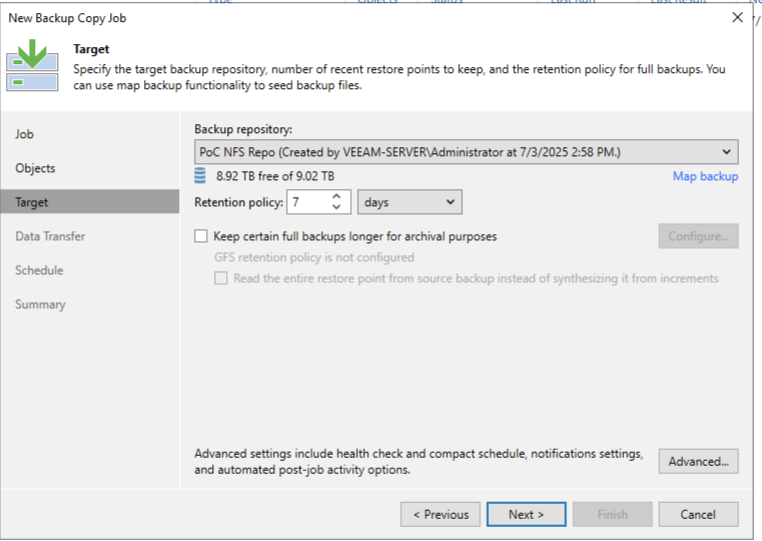
Choose the Data Transfer type appropriate for your environment
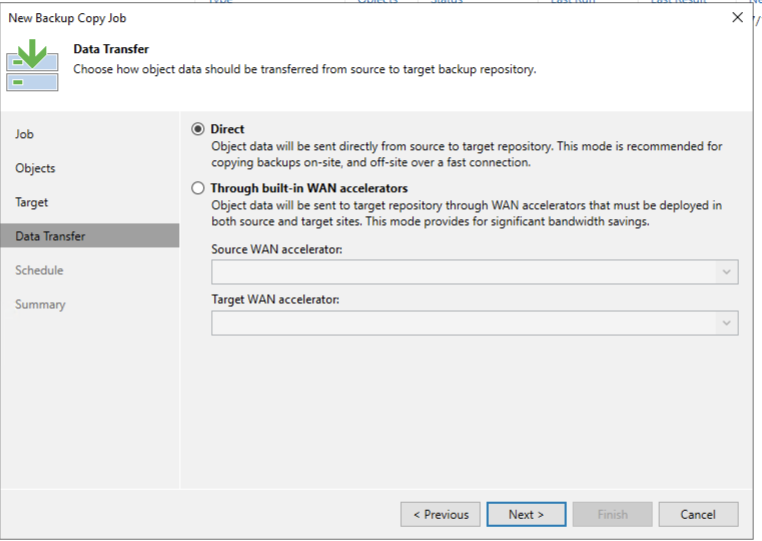
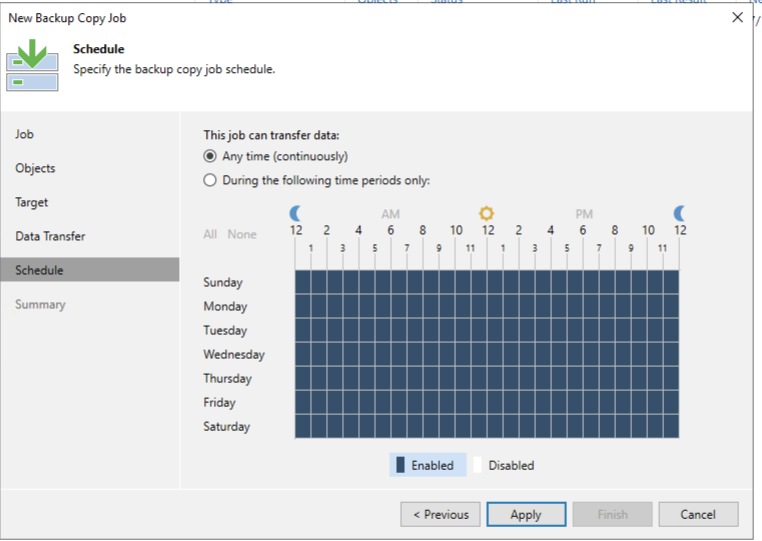
Select the time that the Backup Copy job can run
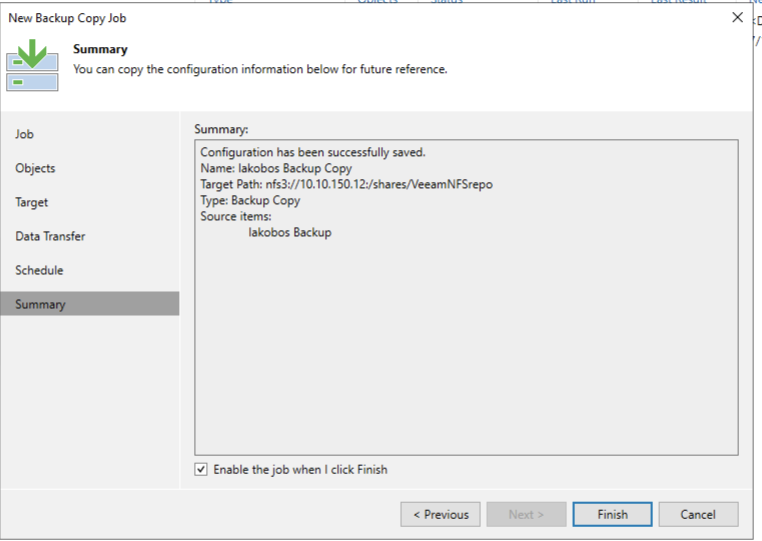
Verify your job settings and enable the job when you click Finish
Copy 3 / Offsite & "Offline" Copy
To have a 3rd offsite and offline copy Veeam Replication can be used. The Replication requires that there be a destination ESX / vSphere Server and a Datastore that is on alternate storage. The Backup jobs use Storage Repositories but the Replication will go directly to an ESX Datastore.
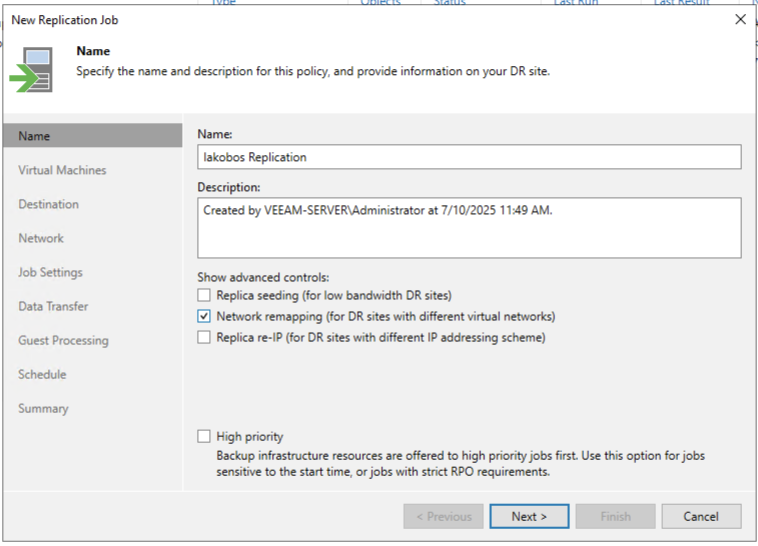
Create the Replication Job in Veeam
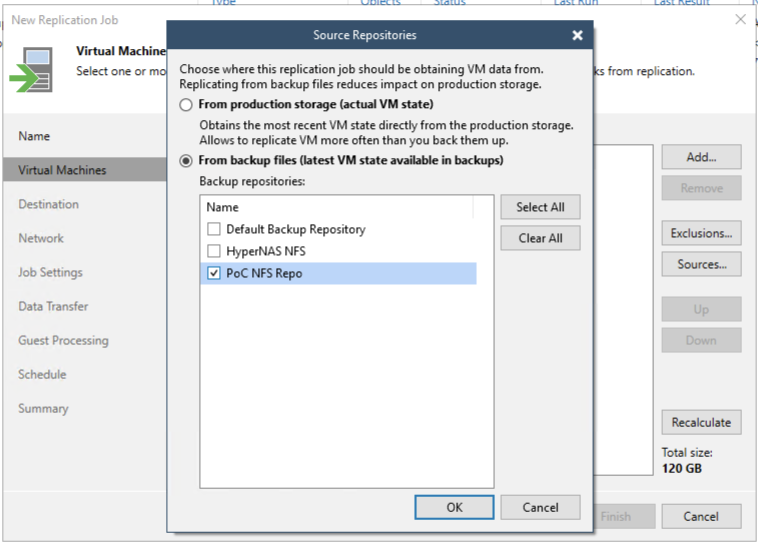
When the Replication job's virtual machines are selected the goal will be to replicate from either the original Backup job or the Backup Copy job. After clicking NEXT, choose Sources.. to bring up the dialog that will allow a choice of the Storage Repository that is intended to be replicated
The Virtual Machines on the Source Repository will be populated in the selections. The default selection can remain or some can be removed strategically per the needs of the user
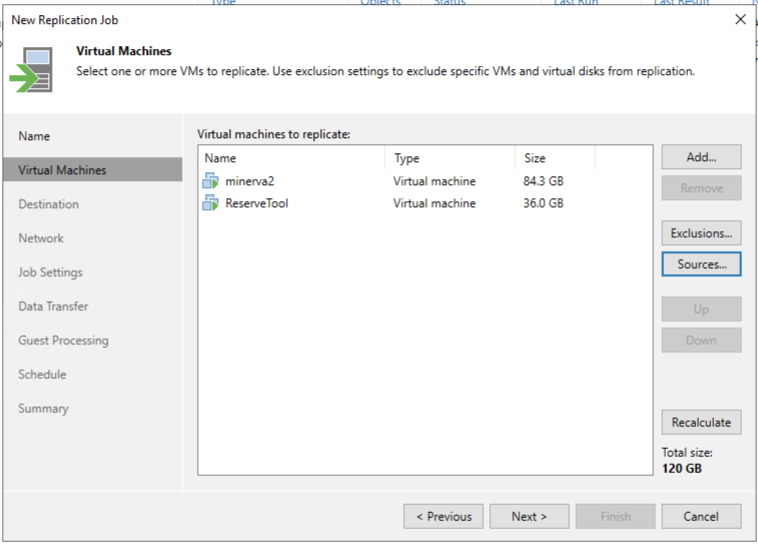
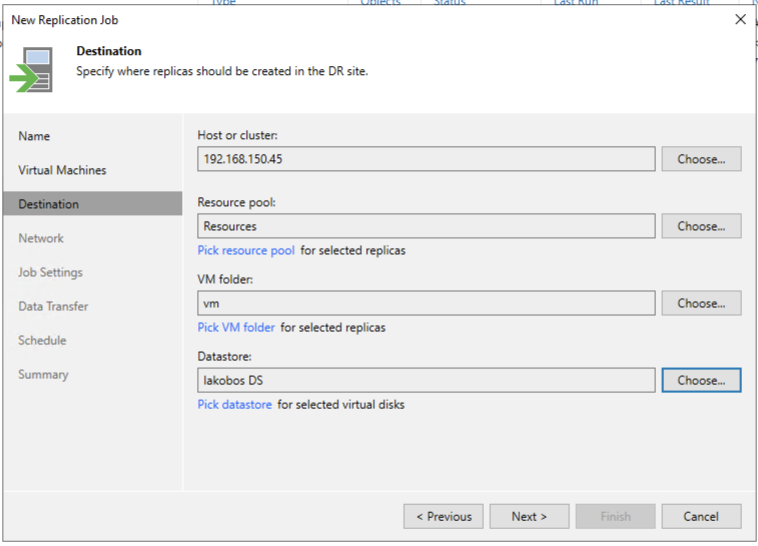
The next dialog requires the destination to be configured. A destination Host/Cluster, the Resource Pool, the VM folder, and Datastore need to be selected
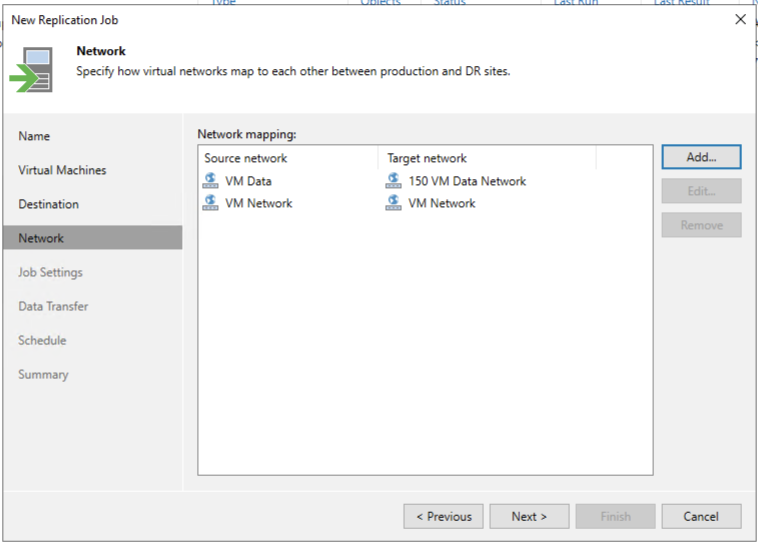
Presumably the VM Networks between the source and destination ESX hosts will be different. The next option is to configure the mapping of the source networks to the destination networks
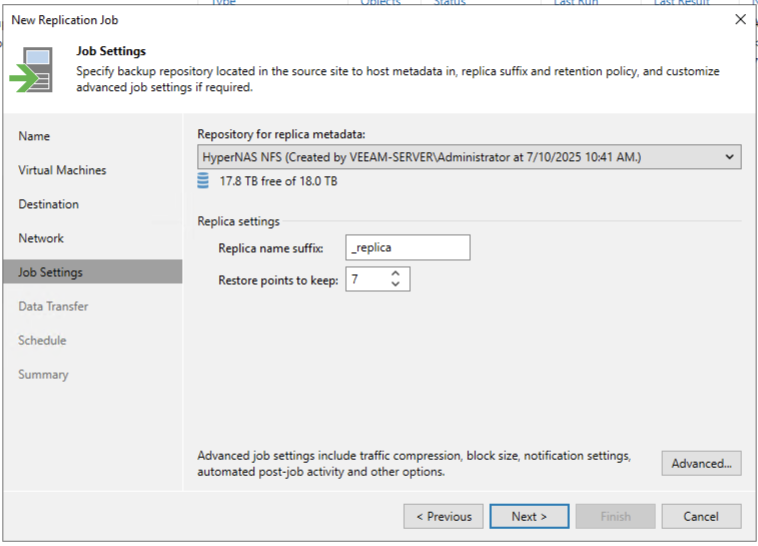
The job settings require that you select a Storage Repository for the replica metadata. This can be either the primary or secondary backup's Storage Repository that was used
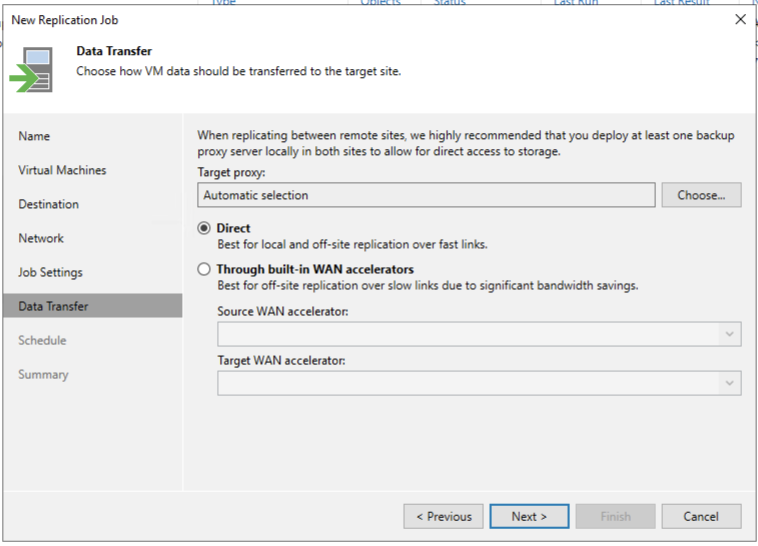
The next configuration is for the Data Transfer. A Target Proxy can be specified or it can be left as an Automatic selection. The transfer can either be Direct or through a WAN accelerator depending on the site's requirements.
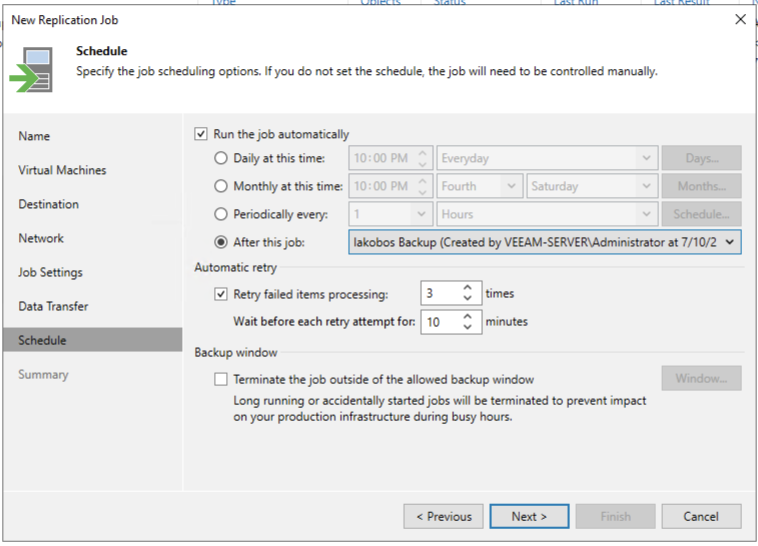
The final configuration detail is to schedule the job. The recommendation is to run the job automatically after the Primary or Secondary backup job completes
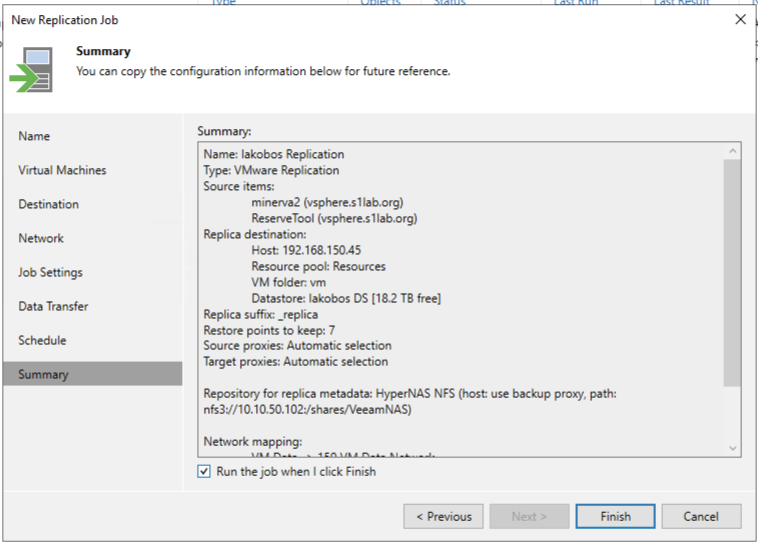
Verify the job settings before finishing the configuration
0 Errors
Verify that the configured backup (which is the basis of the other subsequent jobs) can be restore properly using Veeam's SureCopy job.
If the environment already contains a Veeam Virtual Lab it can be selected for use with this process. If a virtual lab does not exist the configuration of the SureBackup job will provide the opportunity to add one as shown in the following examplesexamples.
The recommendation is for a Full recoverability test
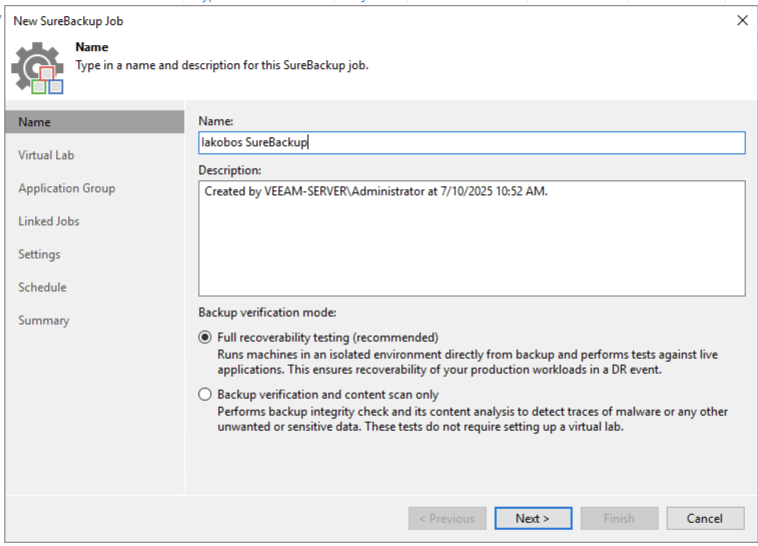
Select or create a Virtual Lab (the examples will create a new one)
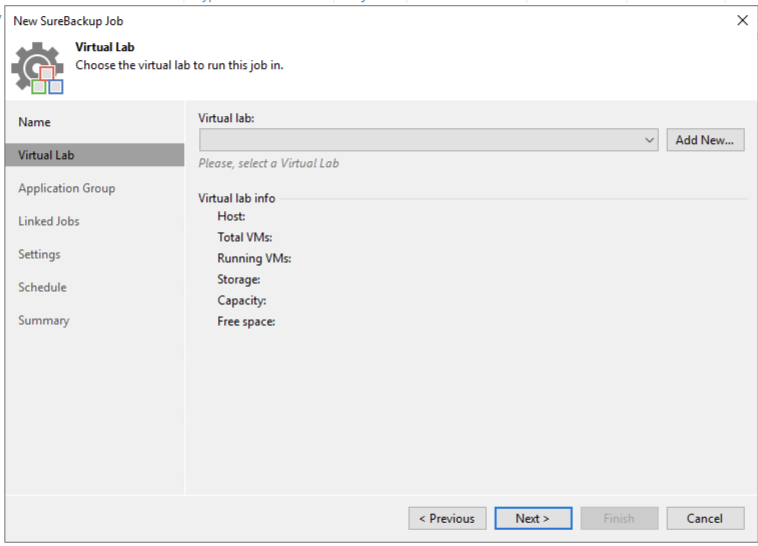
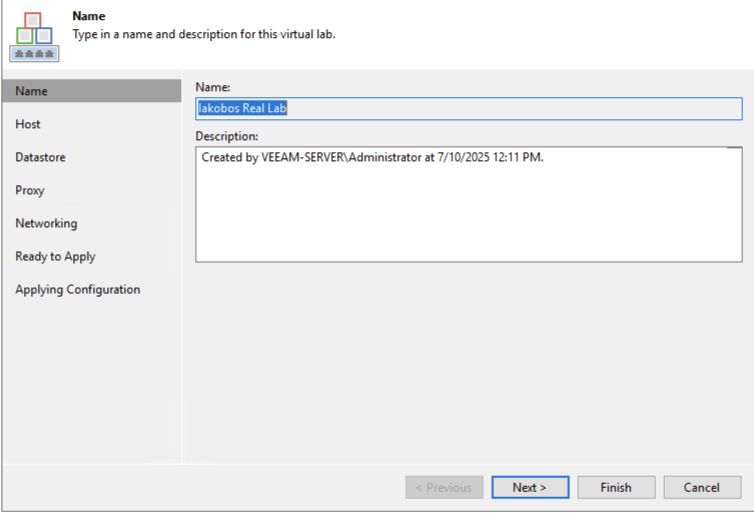
Add New will start the configuration of the Virtual Lab
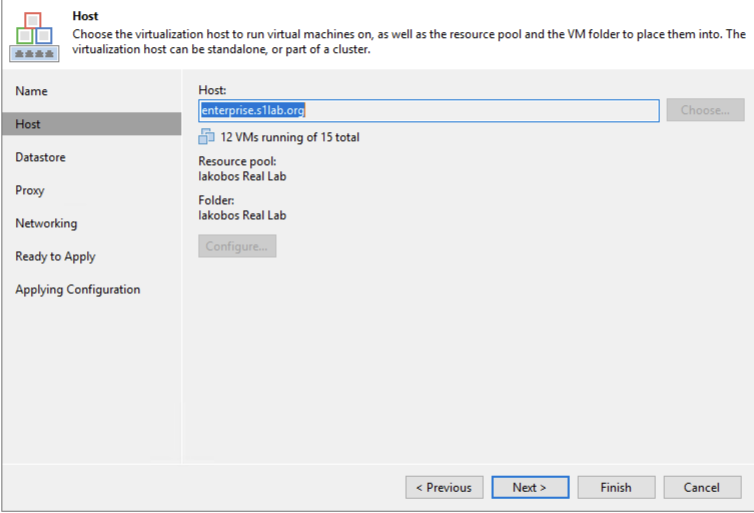
Select the VMware host that the New Virtual Lab will be contained. This host should be colocated with VM source
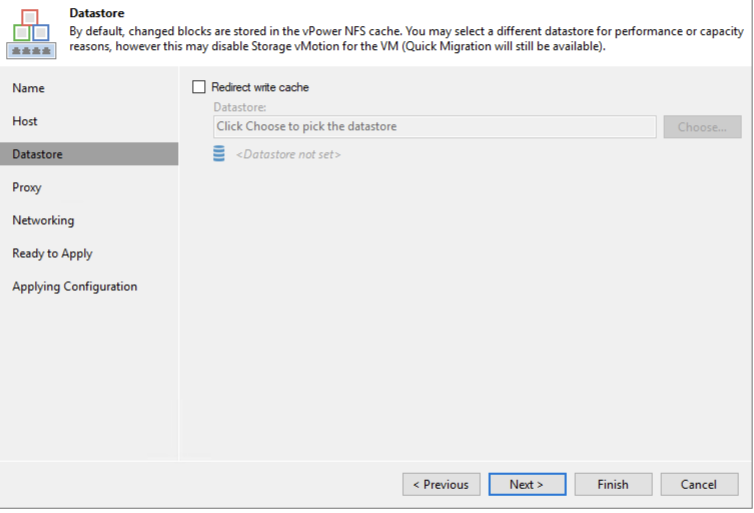
The next configuration option is to chose to redirect write cache to another datastore. This is dependent on the site configuration and availability of resources. It is not a requirement
Next select the EDIT option to ensure that you configure the Virtual Lab to use the proper datastore and production network
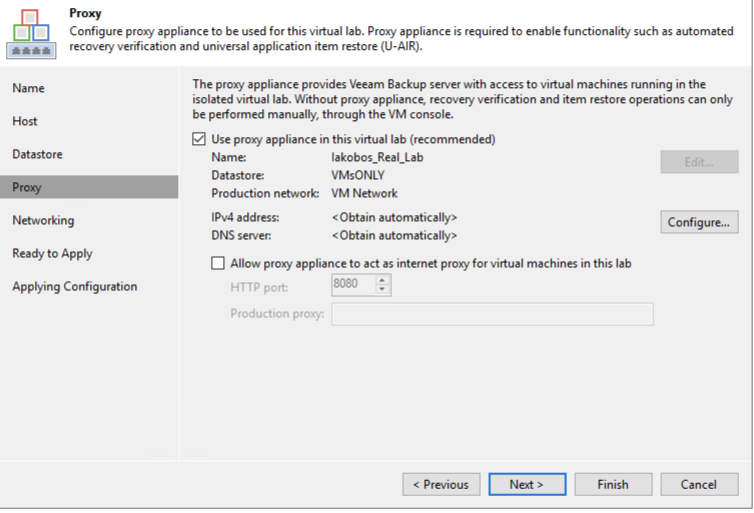
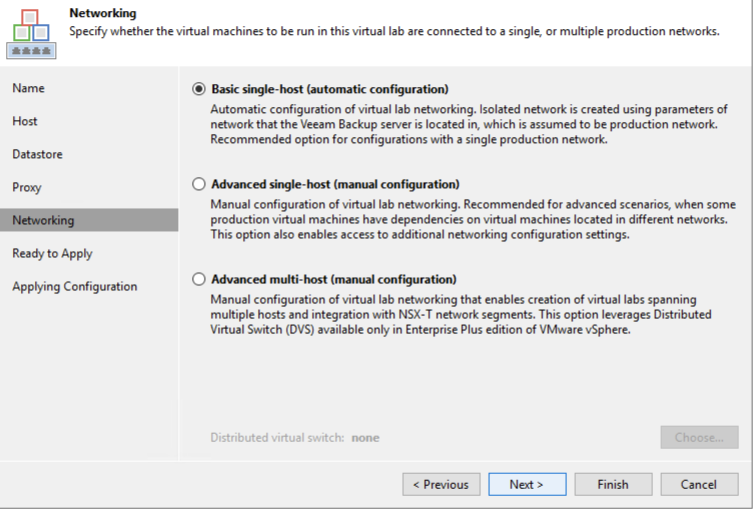
In most cases the Basic single-host configuration should work
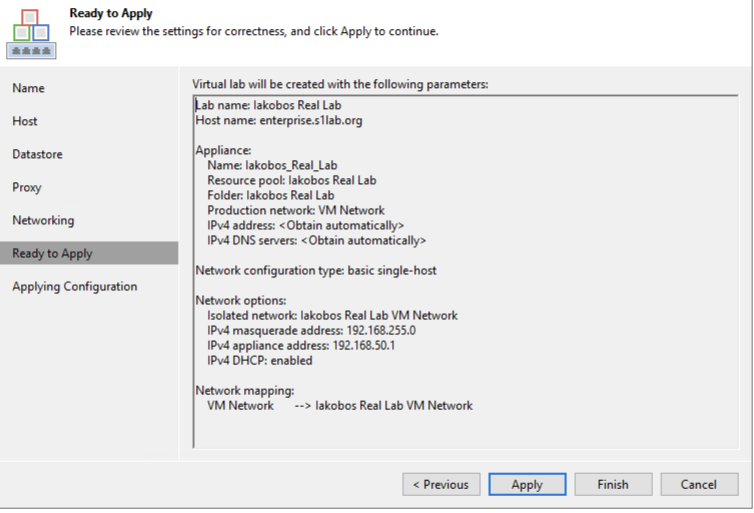
Verify the configuration and select Apply/Finish
The Virtual Lab will now be populated in the SureBackup job configuration and the configuration can proceed to the next steps
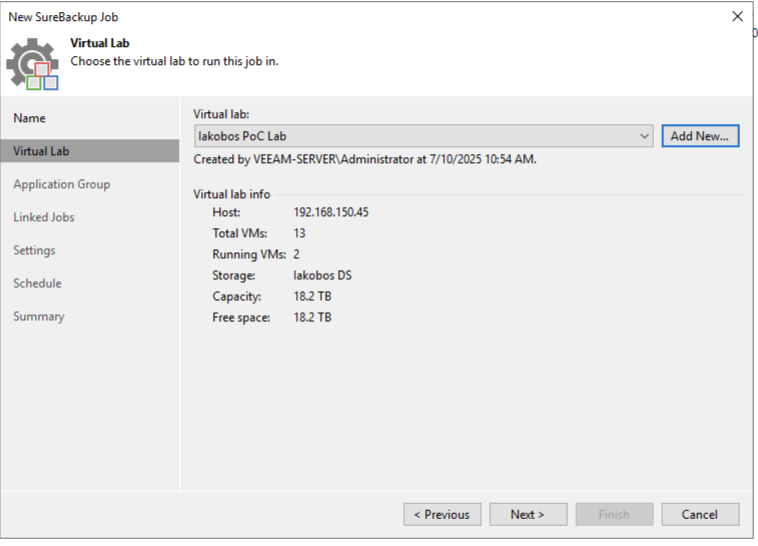
If Application Groups are in use they can be selected in the next configuration dialog. Otherwise the Next button can be clicked to move to the next stage
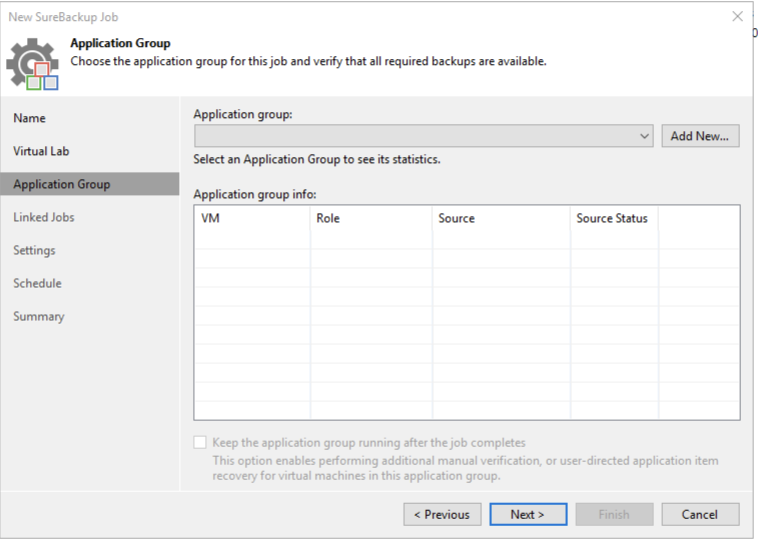
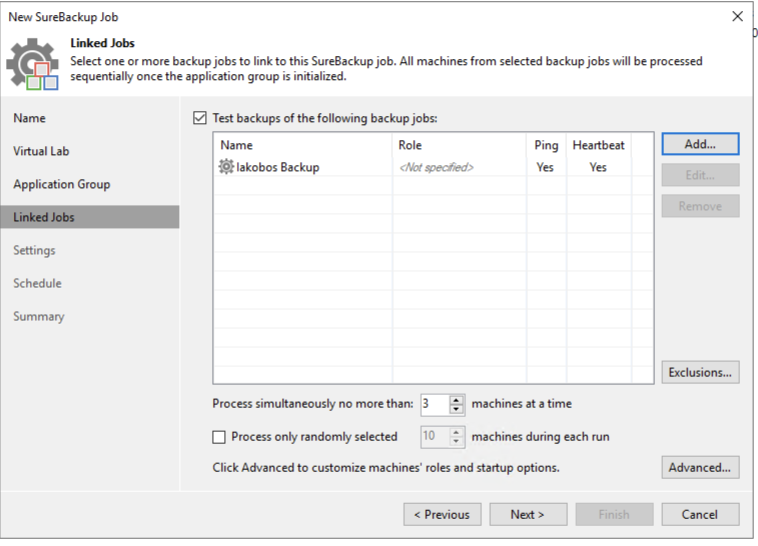
At this stage the job to be tested (the backup job) can be linked to the configuration
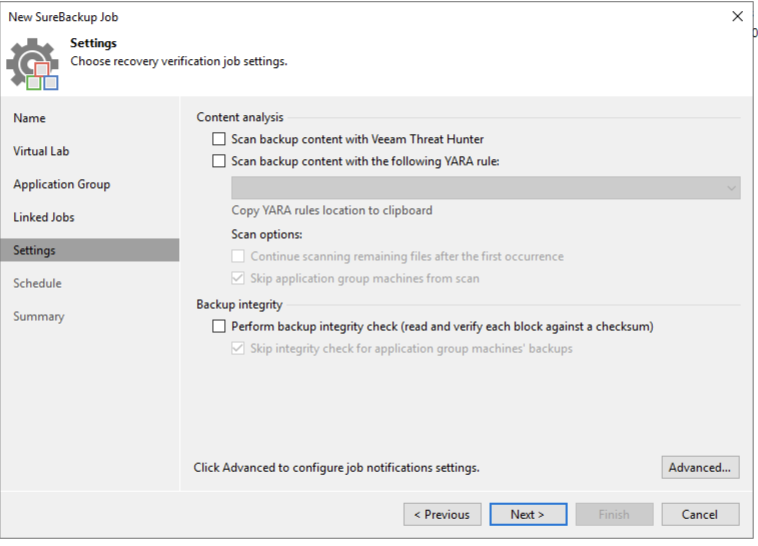
With the next configuration step the option to scan the backups can be made as well as testing backup integrity
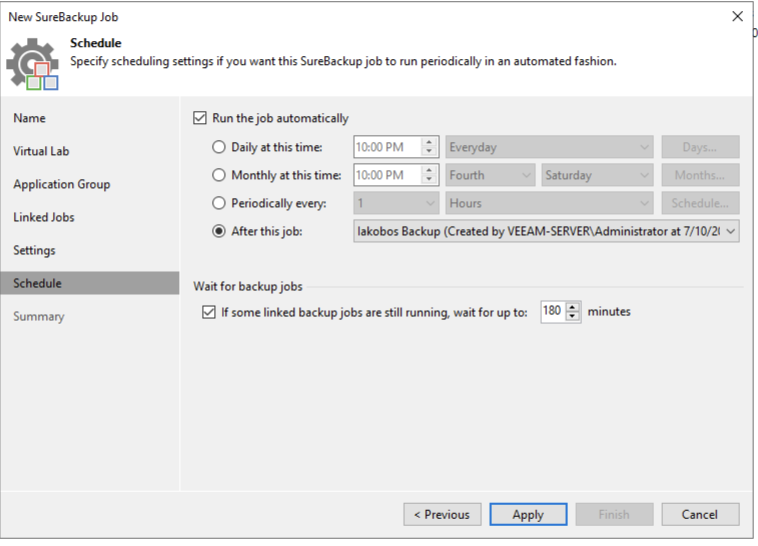
Configure the schedule of the job with the recommendation to run after the job that is being tested
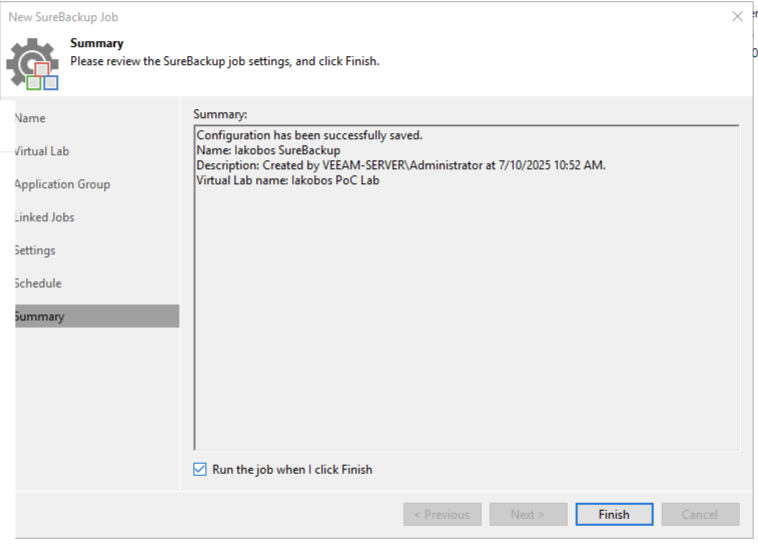
Verify the summary and click Finish